
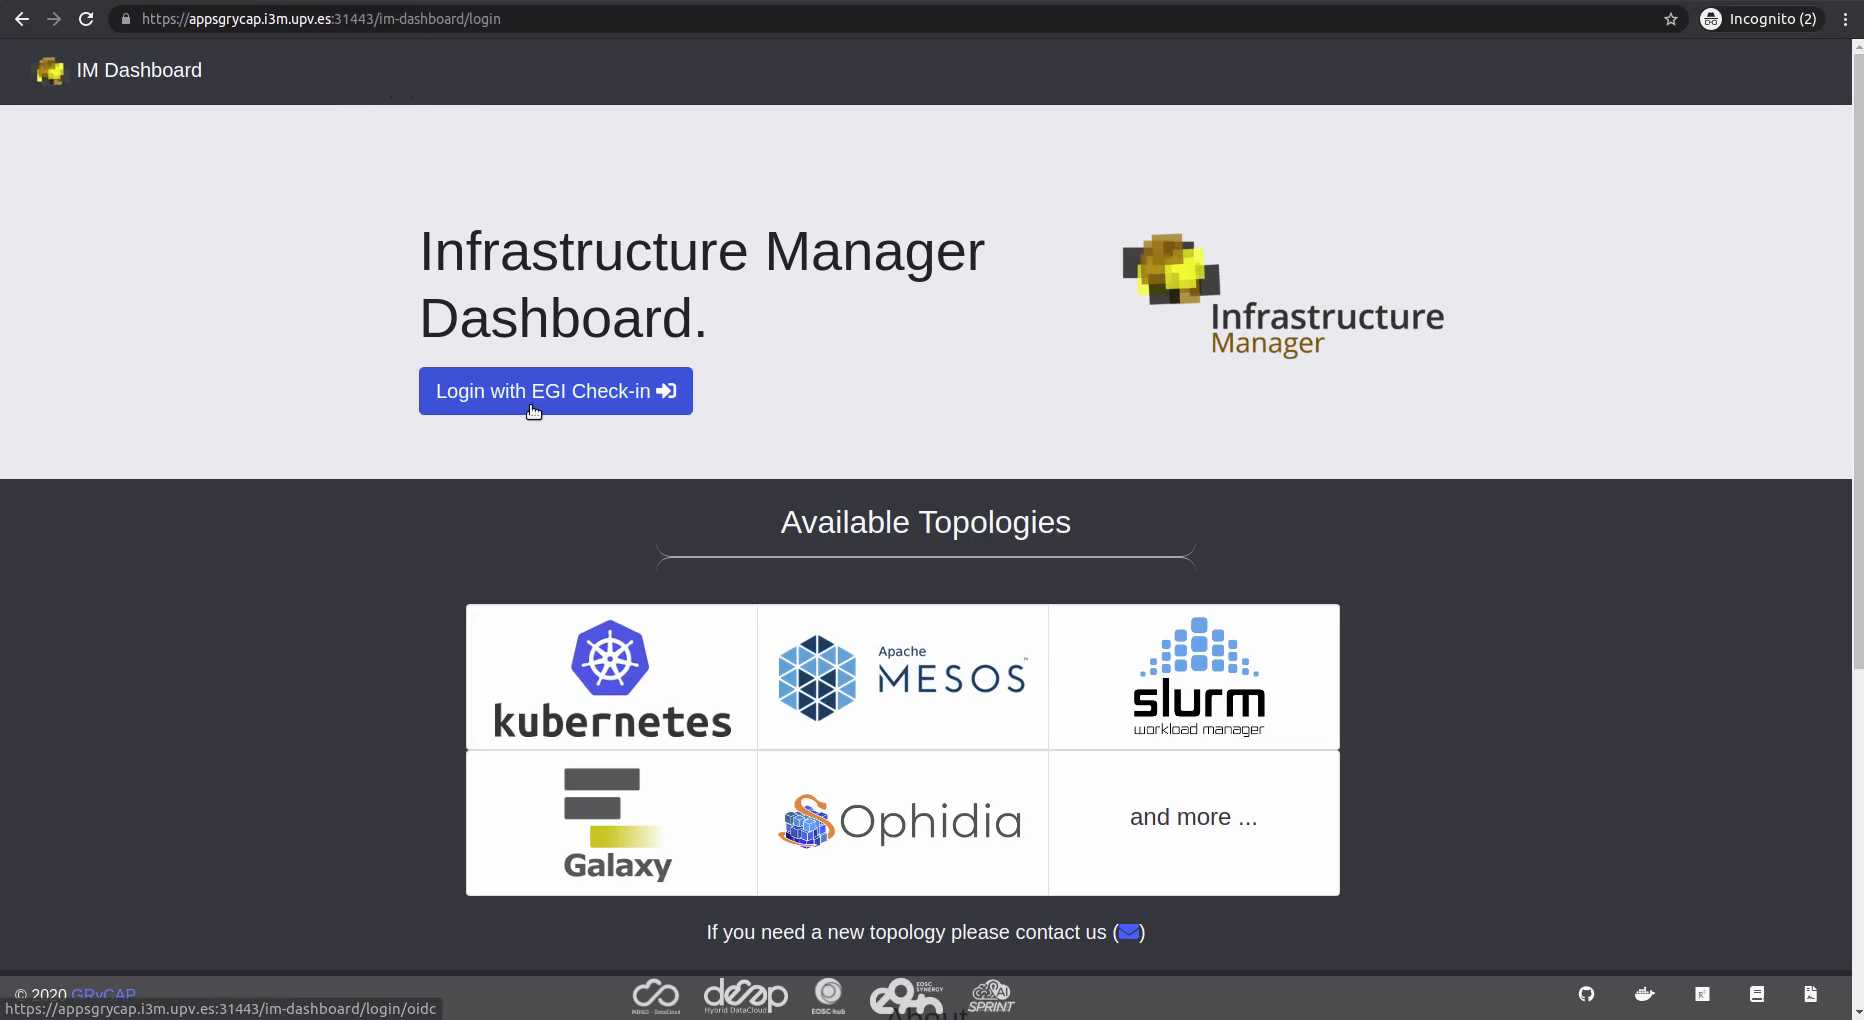
Here we present a step by step guide to help you deploy an OSCAR cluster in the EGI Federated Cloud, specifically in the EOSC-Synergy VO. We are using the IM Dashboard, a tool developed by the GRyCAP research group at the Universitat Politècnica de València to facilitate the deployment of infrastructures in a lot of cloud providers. Alternatively, you can follow our YouTube video, at the end of the post.
Step 1: Go the the IM Dashboard and click the button “Login with EGI-Check-in”.
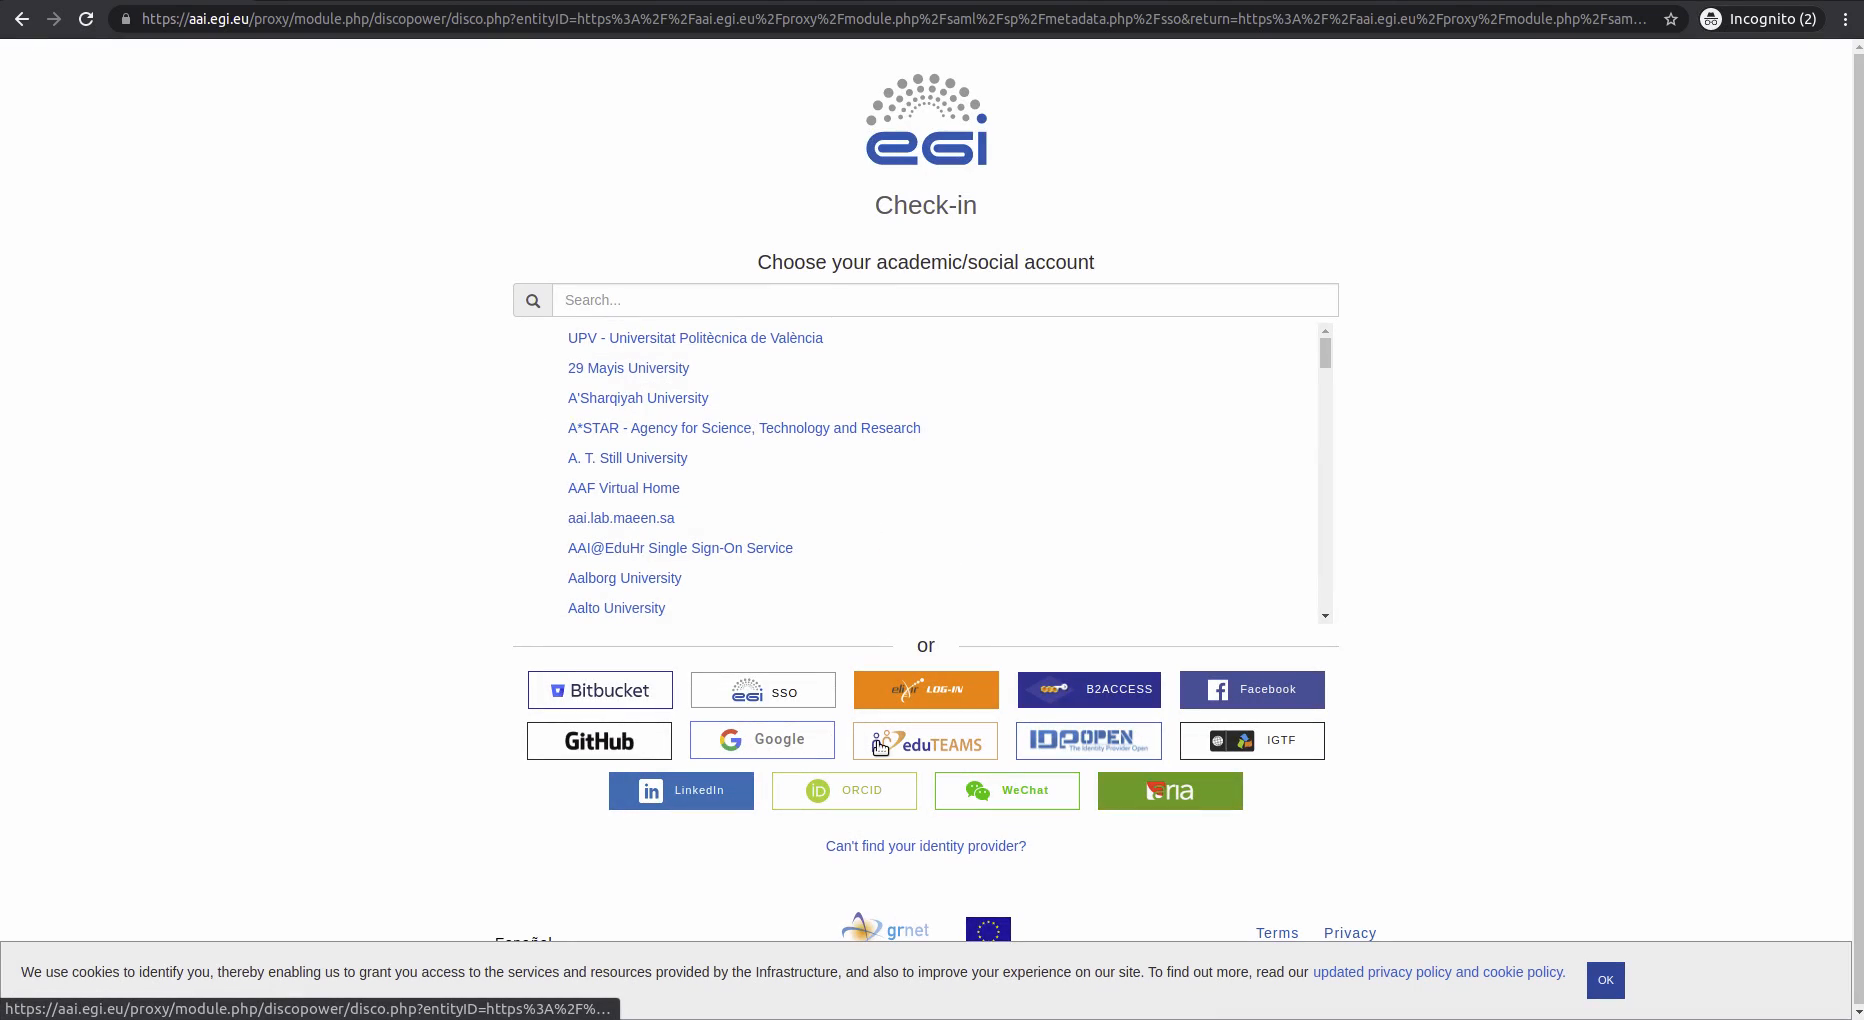
Step 2: EGI Check-in supports multiple identity providers, select one and access the IM Dashboard.
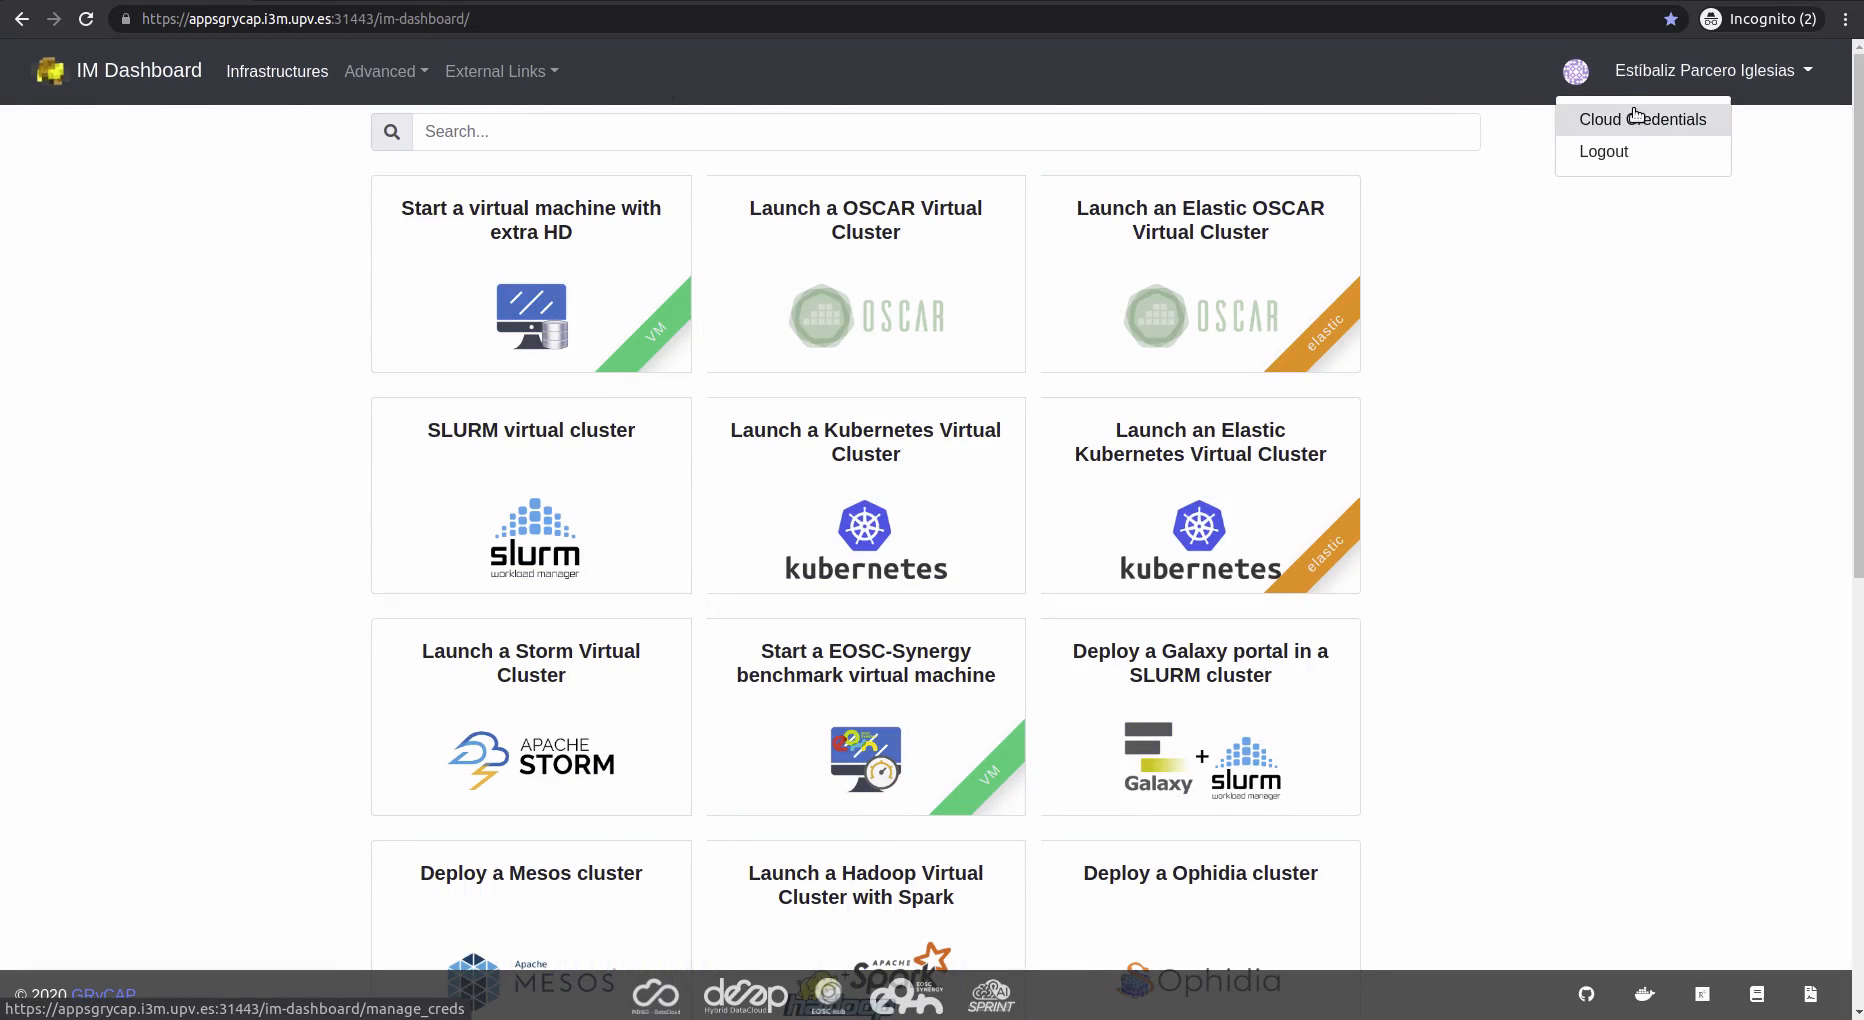
Step 3: Go to the top right corner and click on your username to access “Cloud Credentials”.
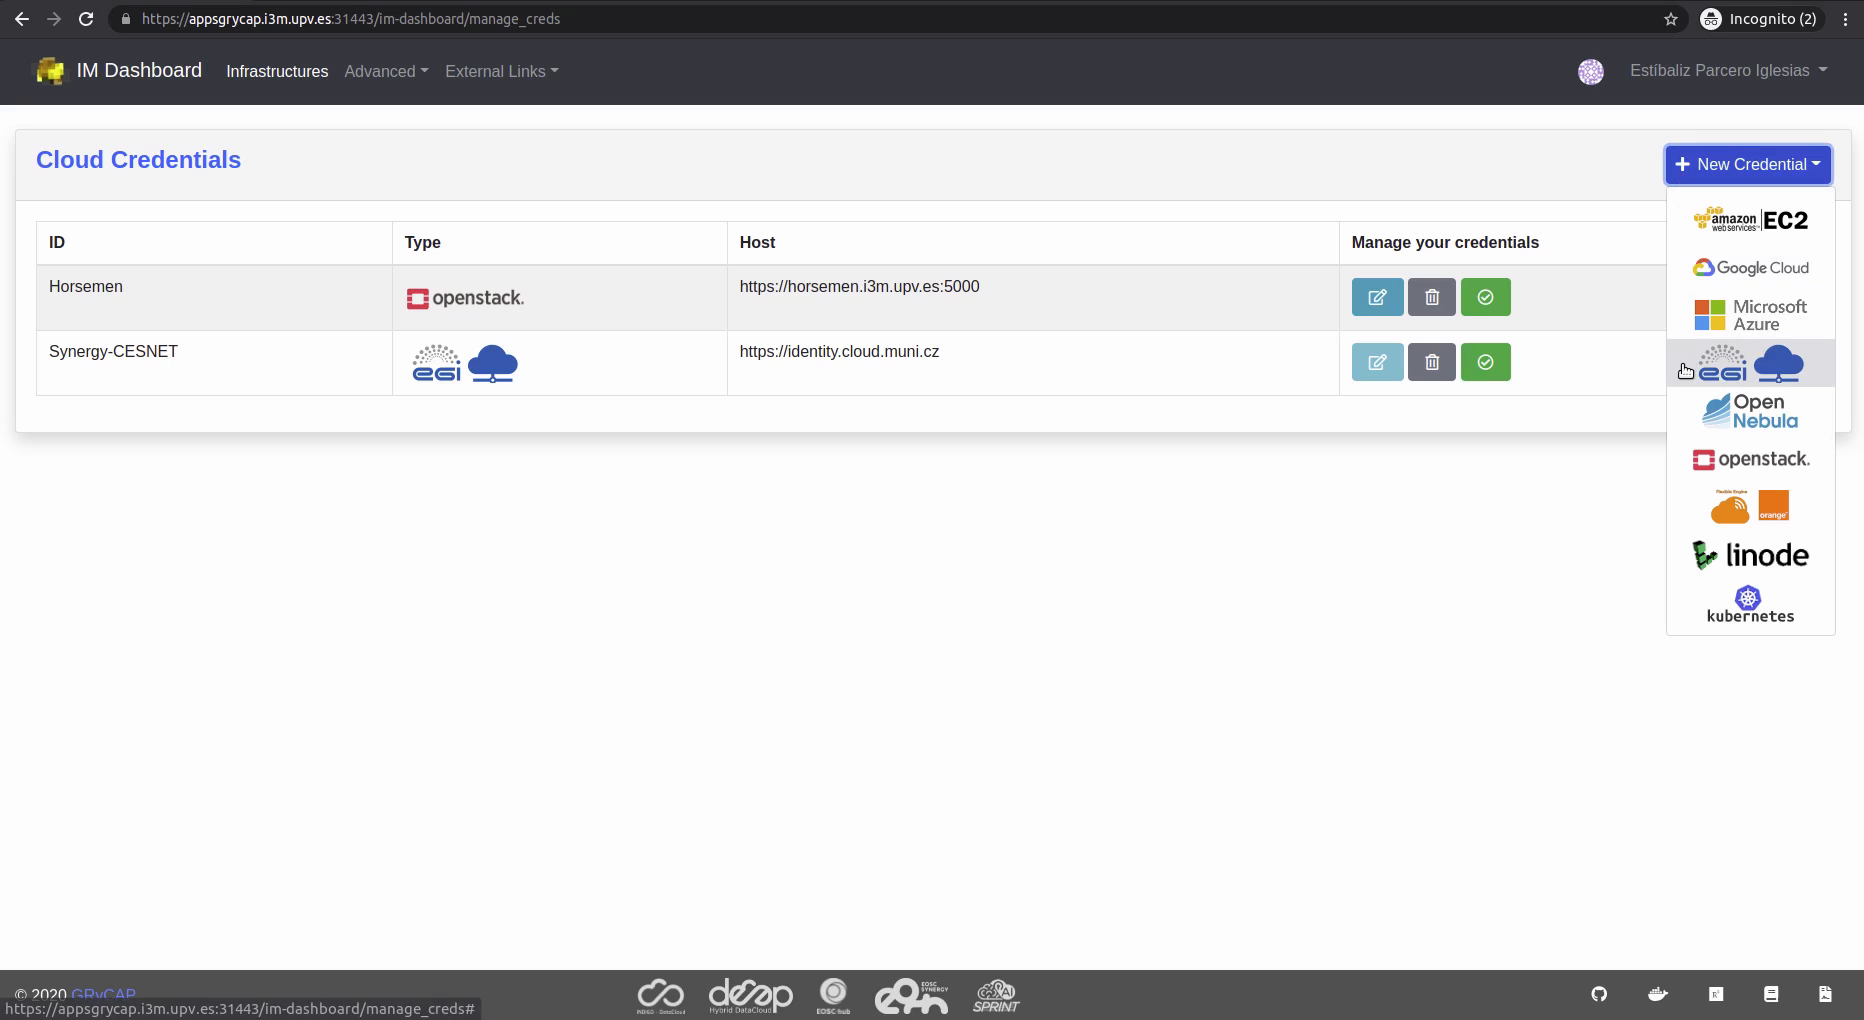
Step 4: Click “New Credential” button and select EGI.
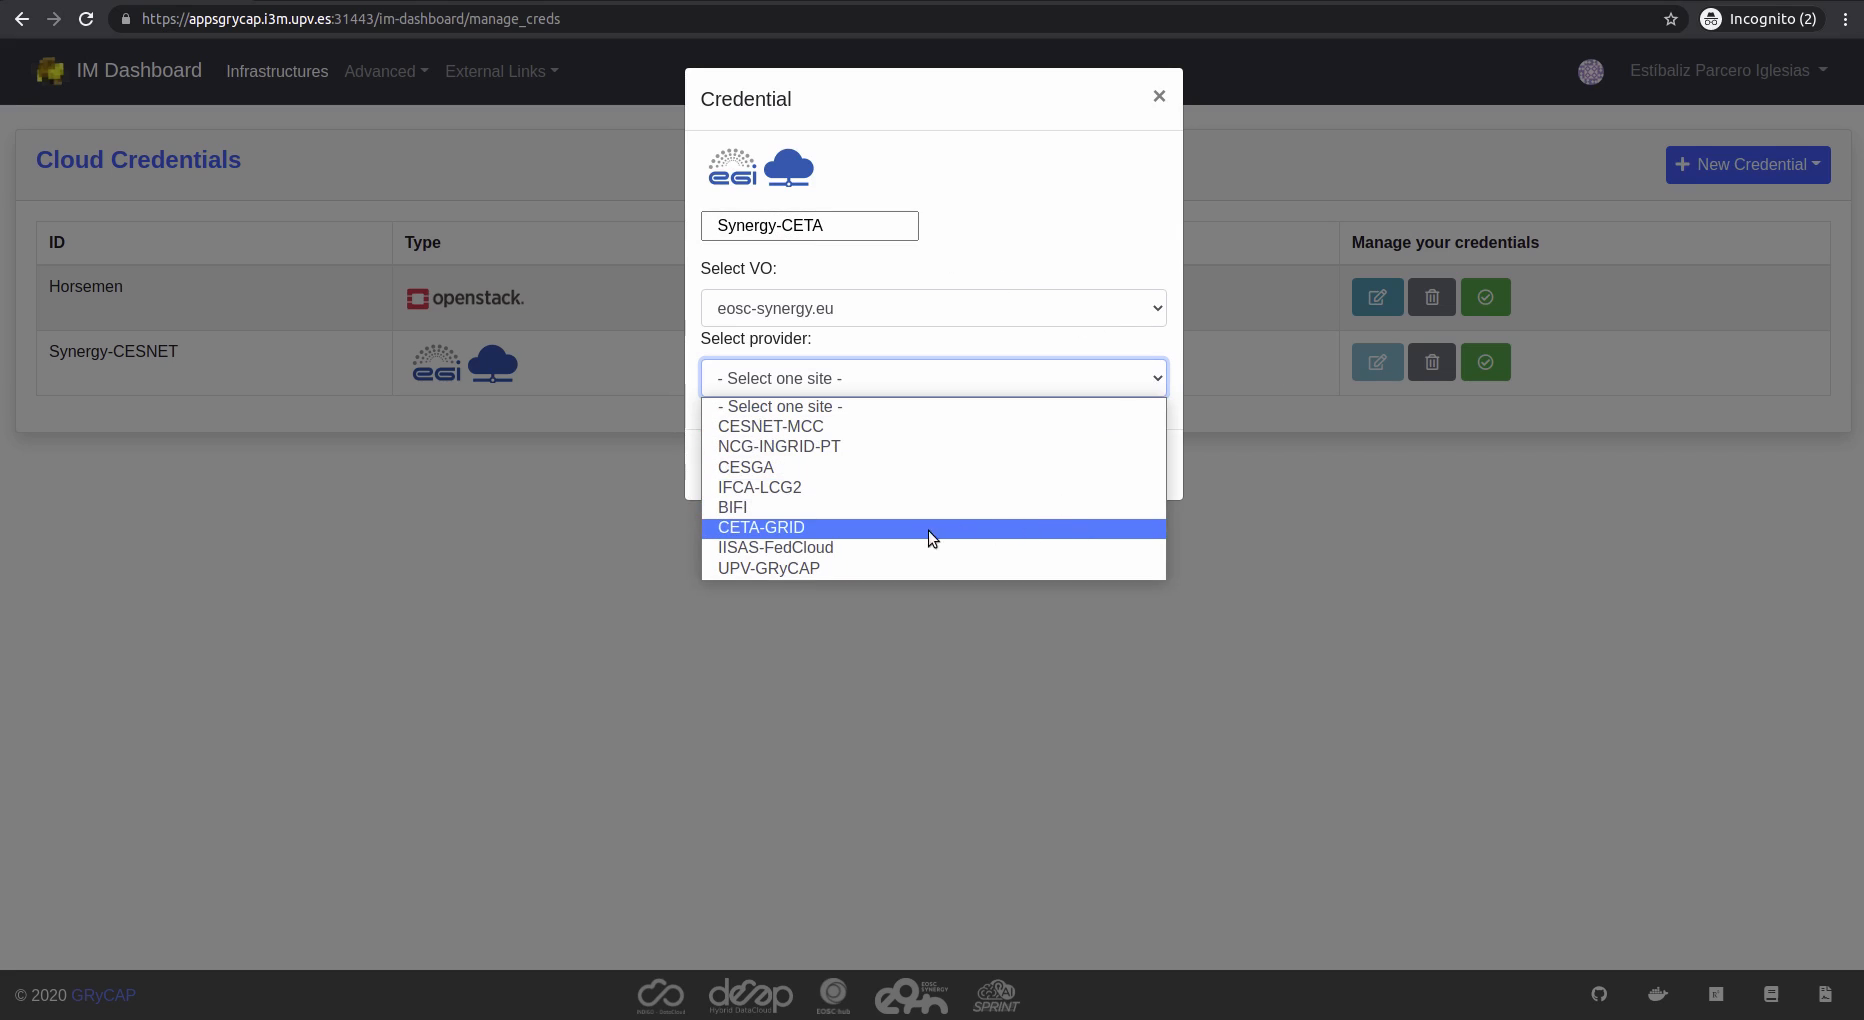
Step 5: Write a new name for your new credential, select the EOSC-Synergy VO, and select the desired provider (the dropdown list can take a few seconds to load). Click “Add” to finish.
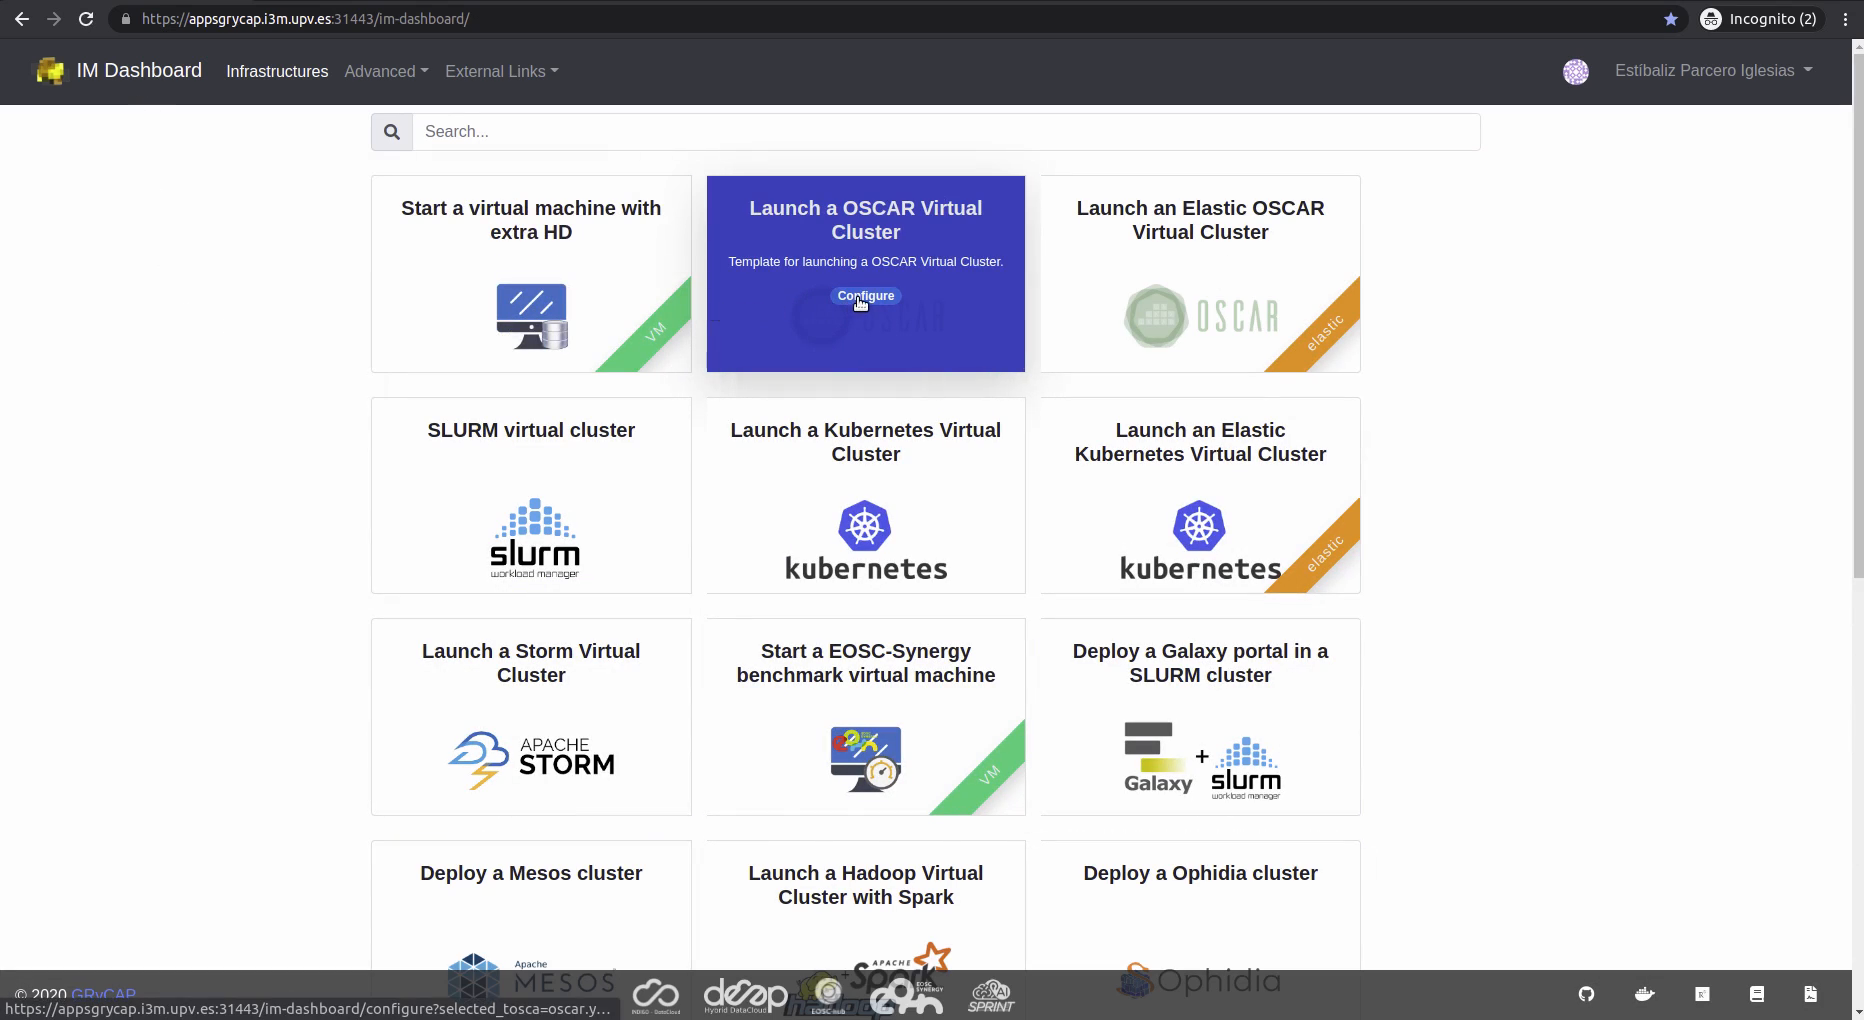
Step 6: Return to the IM Dashboard by clicking on “IM Dashboard” at the top left corner. Go to “Launch an OSCAR Virtual Cluster” and click “Configure”.
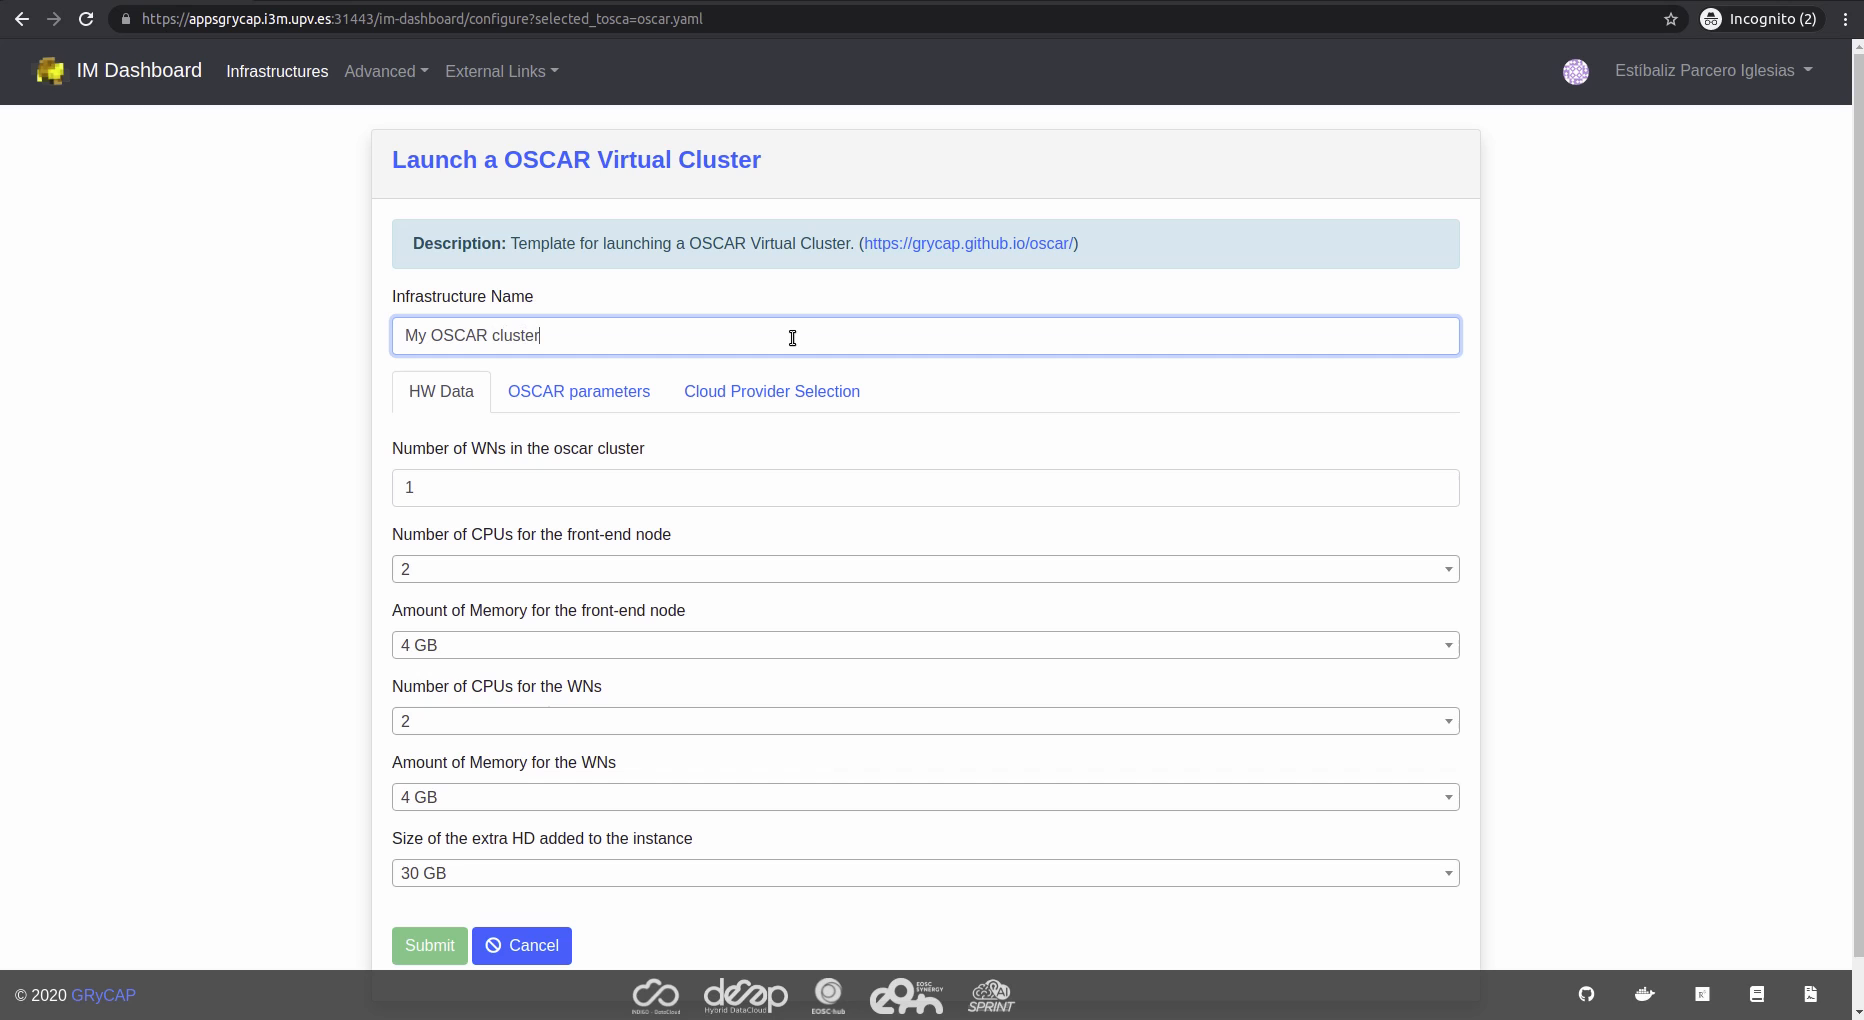
Step 7: “HW Data” tab will open. Give your infrastructure a name of your choice, and fill out the hardware data.
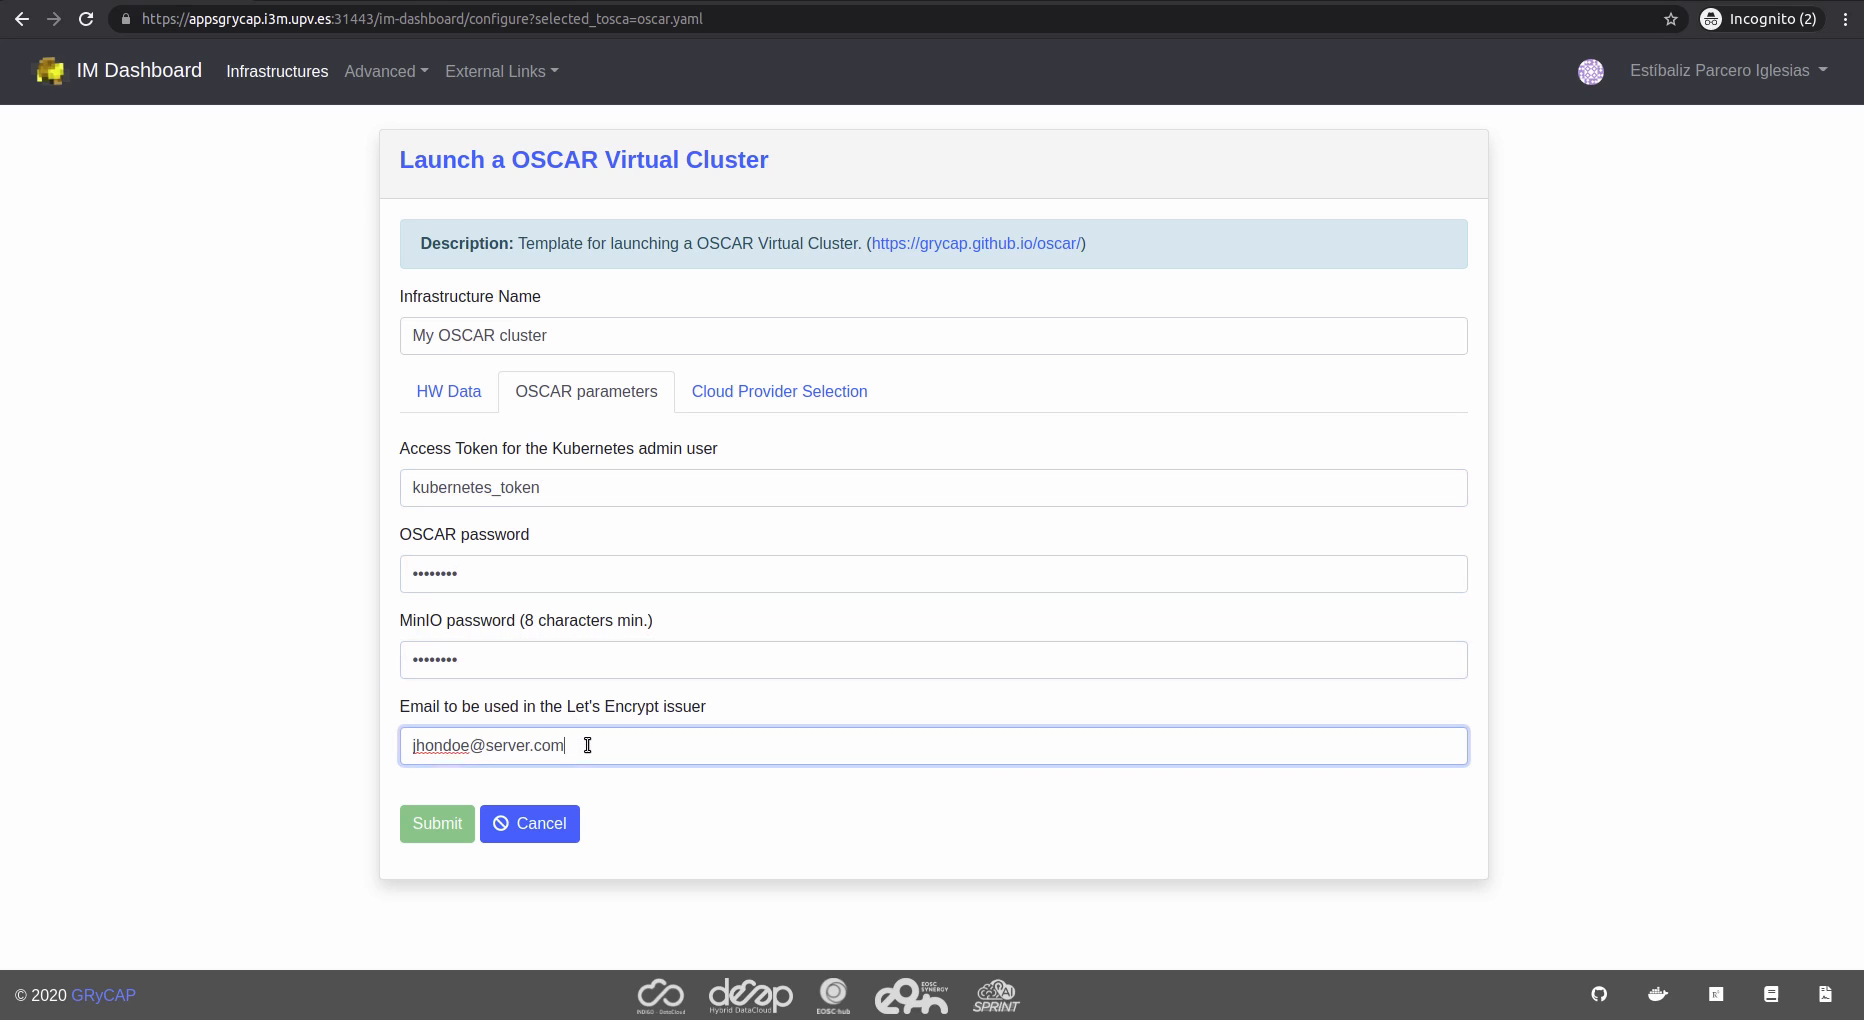
Step 8: Click “OSCAR Parameters” tab and fill out the form.
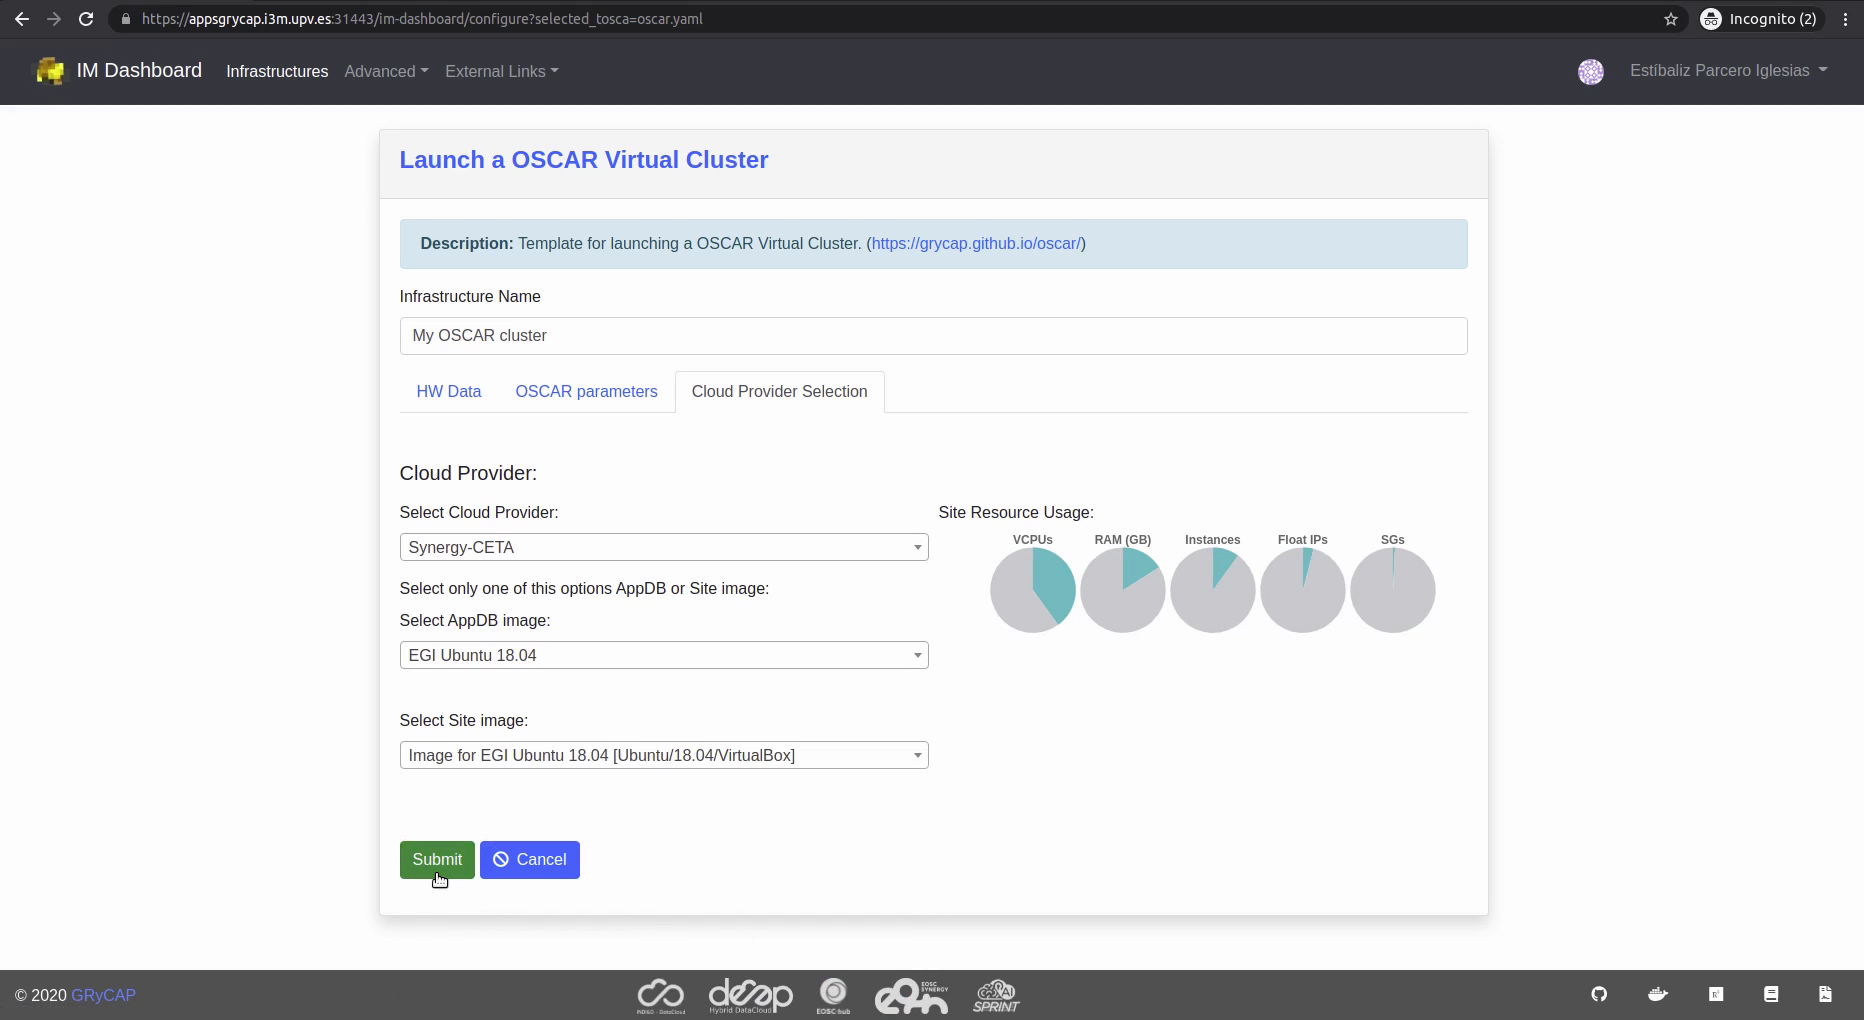
Step 9: Click “Cloud Provider Selection” tab and select the newly created cloud provider in step 5. Choose the desired images for your OSCAR cluster. Click “Submit”.
Step 10: The page “My Infrastructures” will open, and we can see the deployed or in deployment infrastructures.
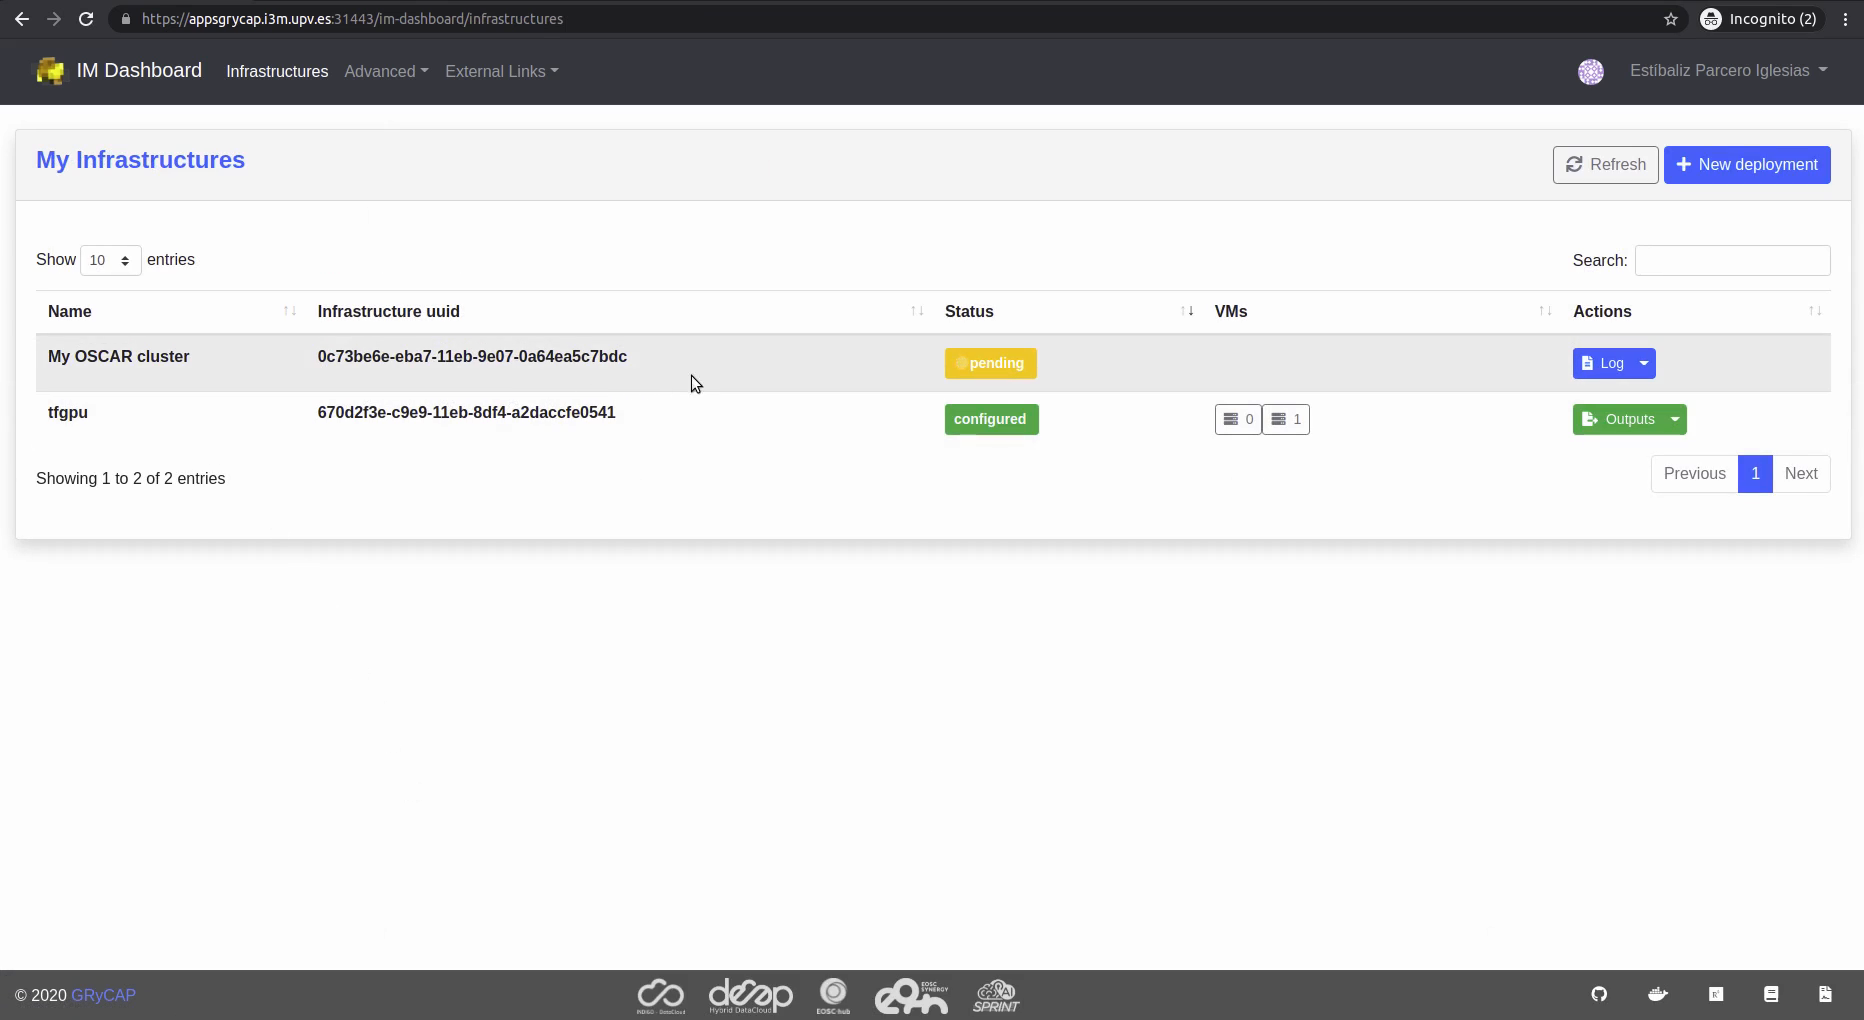
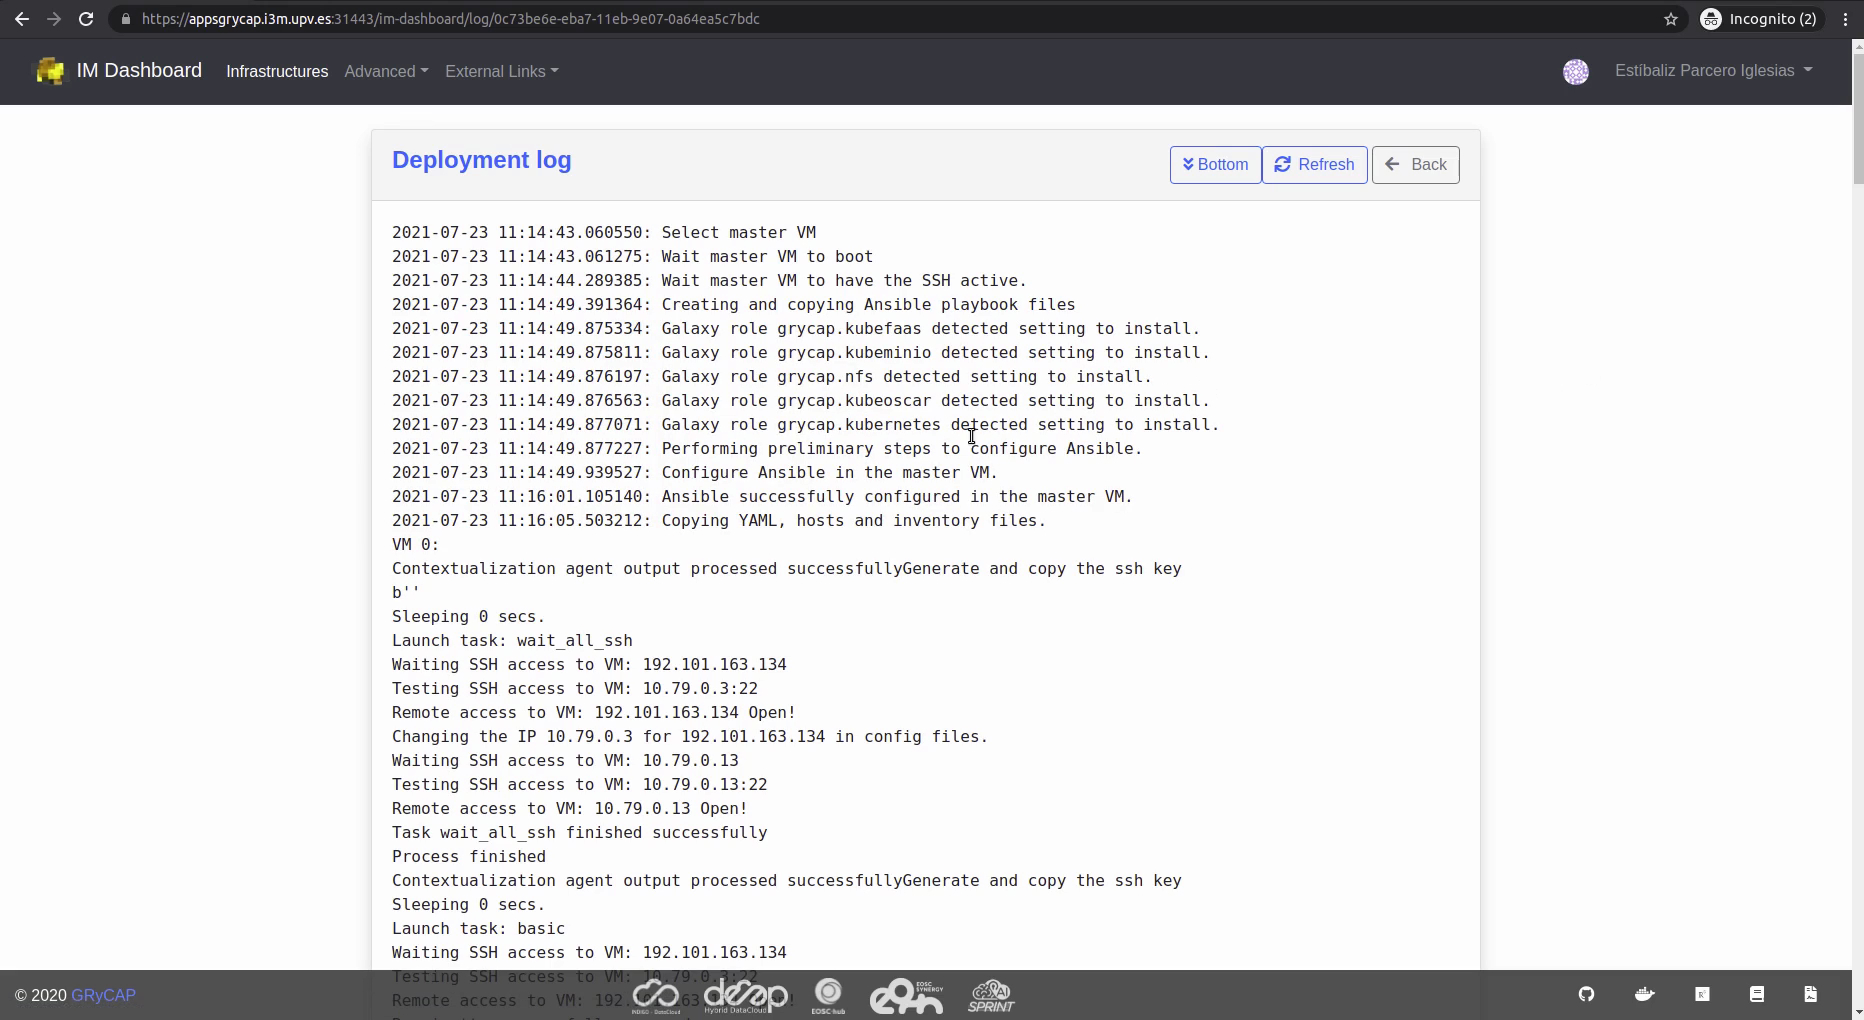
Step 11: (Optional) By clicking the button “Logs” we can check the current status of our deployment.
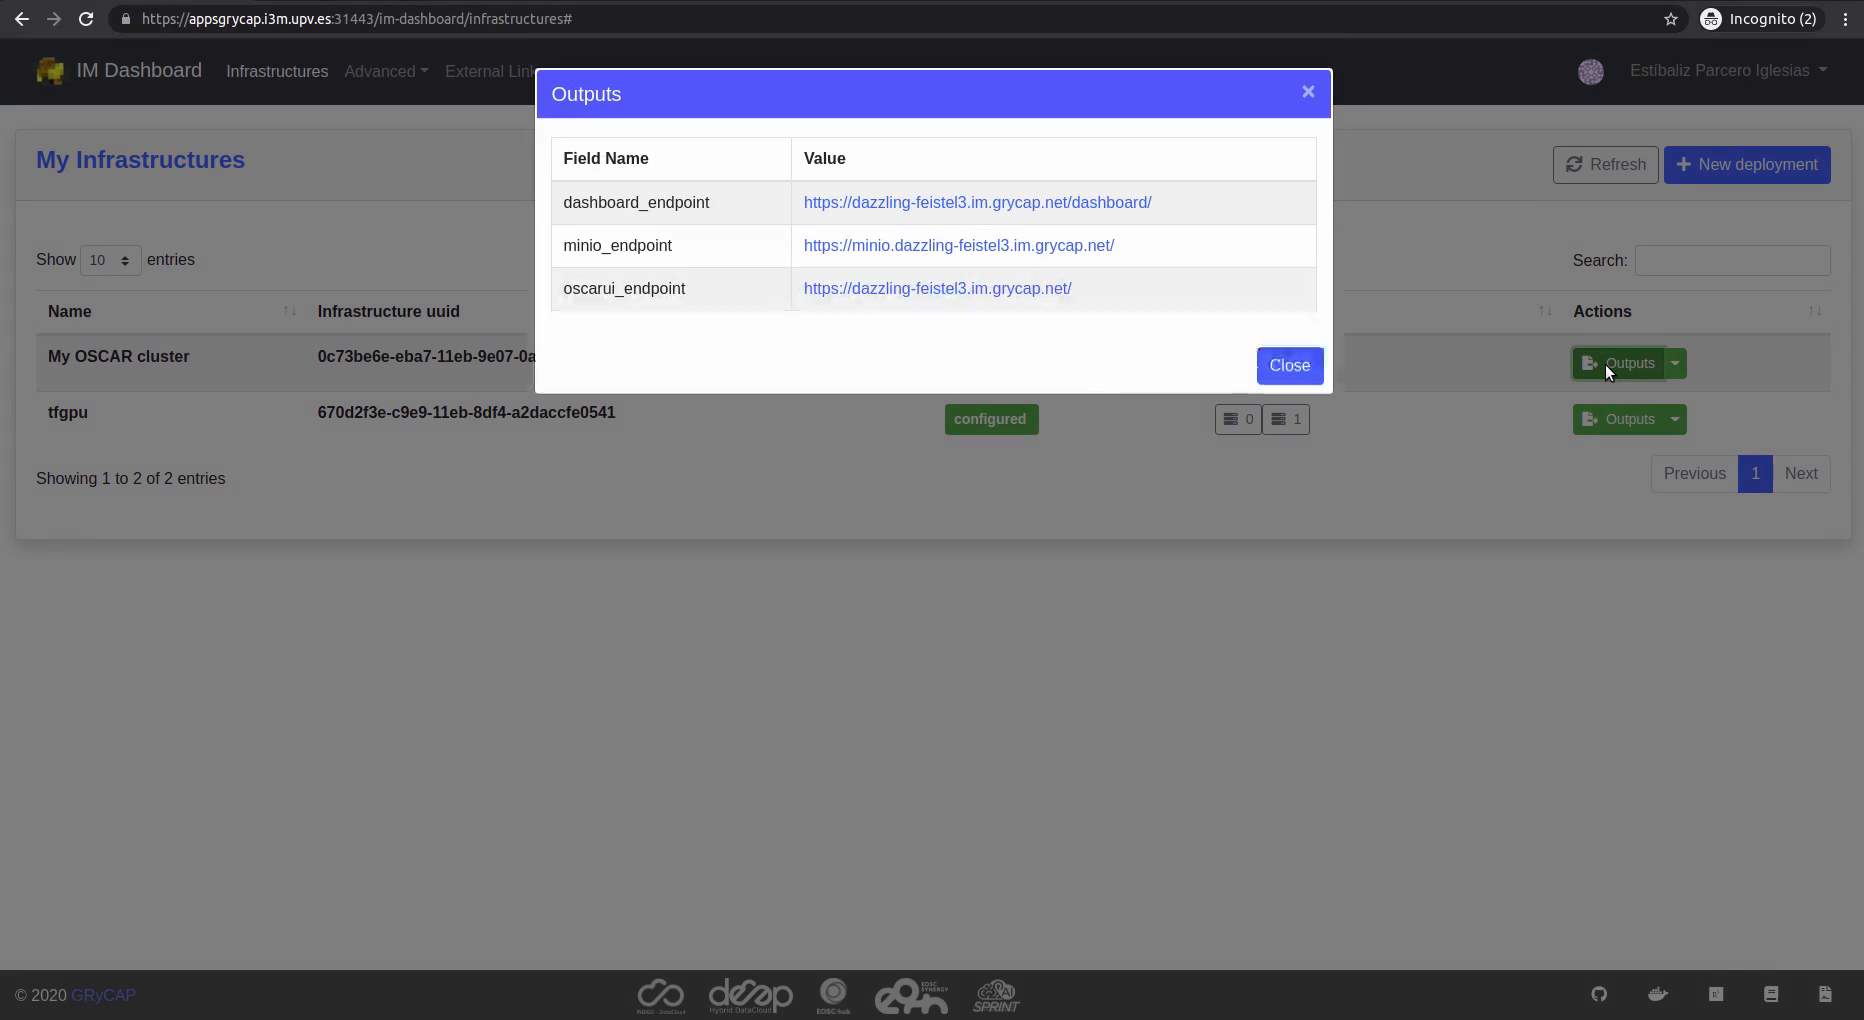
Step 12: Once our OSCAR cluster is deployed, the “Logs” button changes to “Outputs”. Click the button: we get custom URLs to the Kubernetes dashboard, the MinIO portal, and the OSCAR UI.
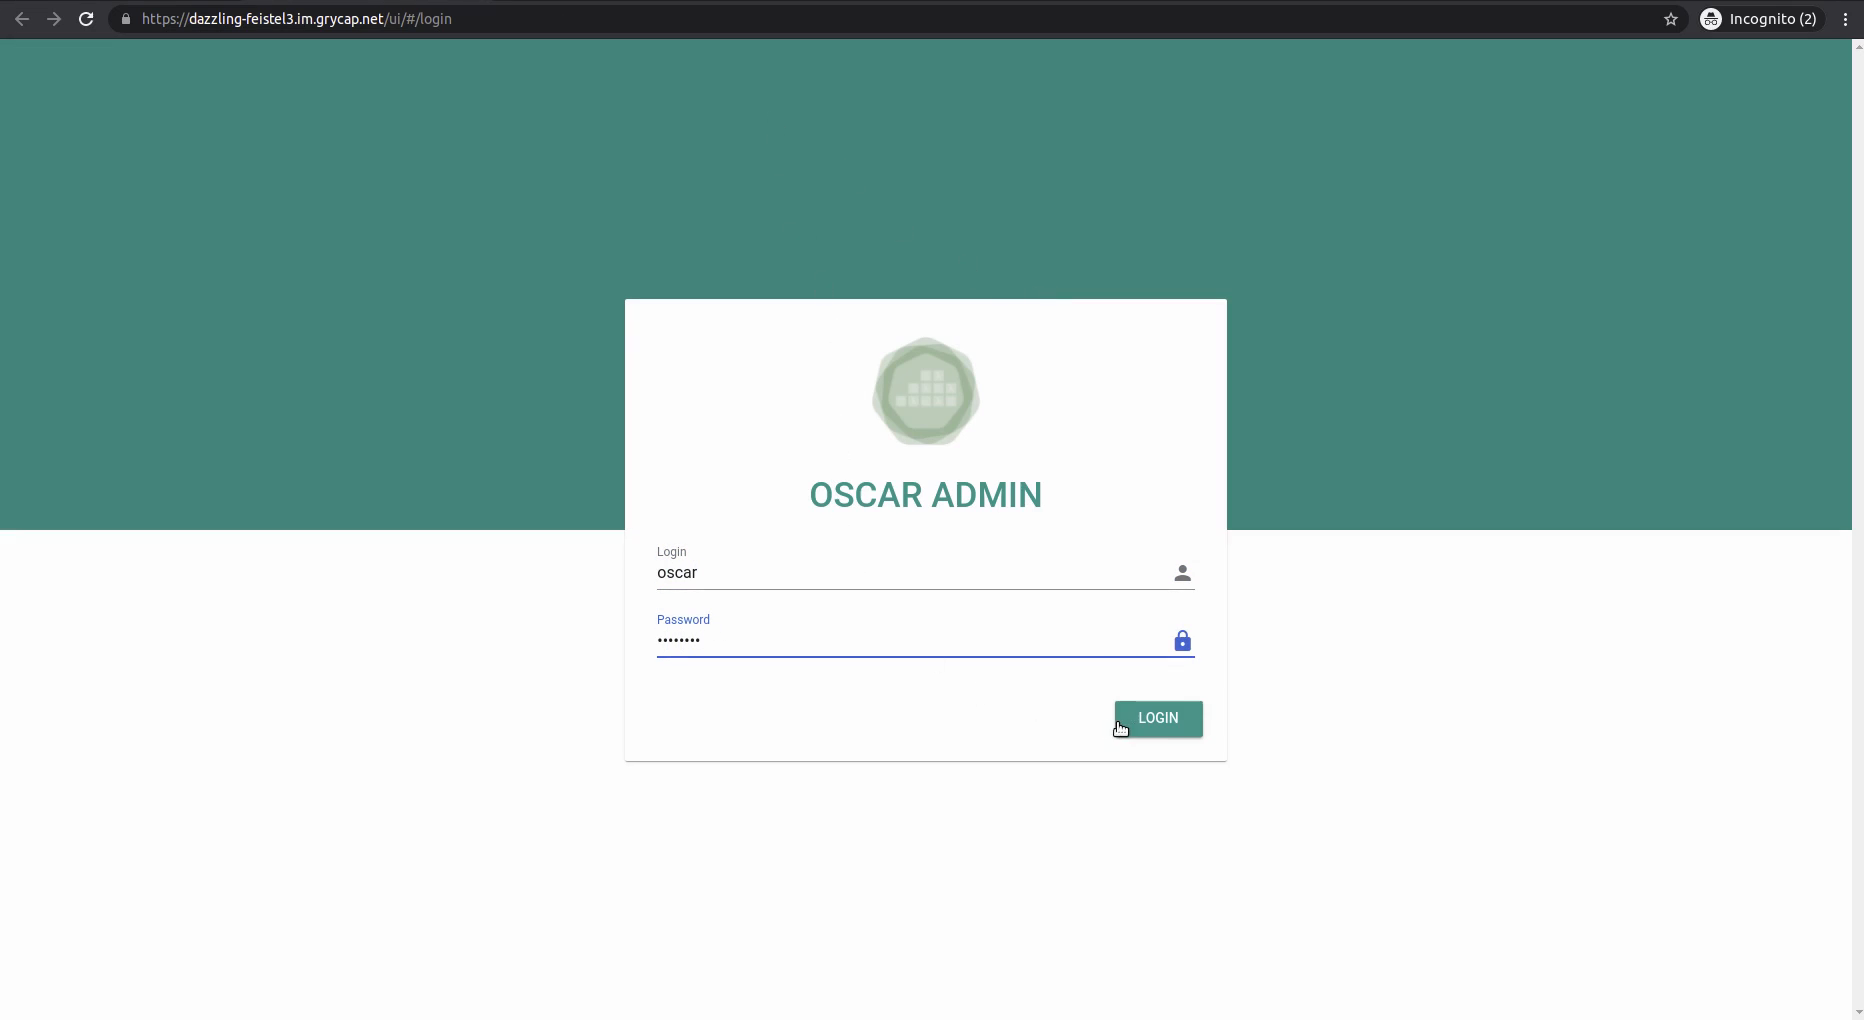
Step 13: By clicking on the “oscarui_endpoint” URL we get the OSCAR UI that can be accessed with the username oscar and the specified password in step 8.
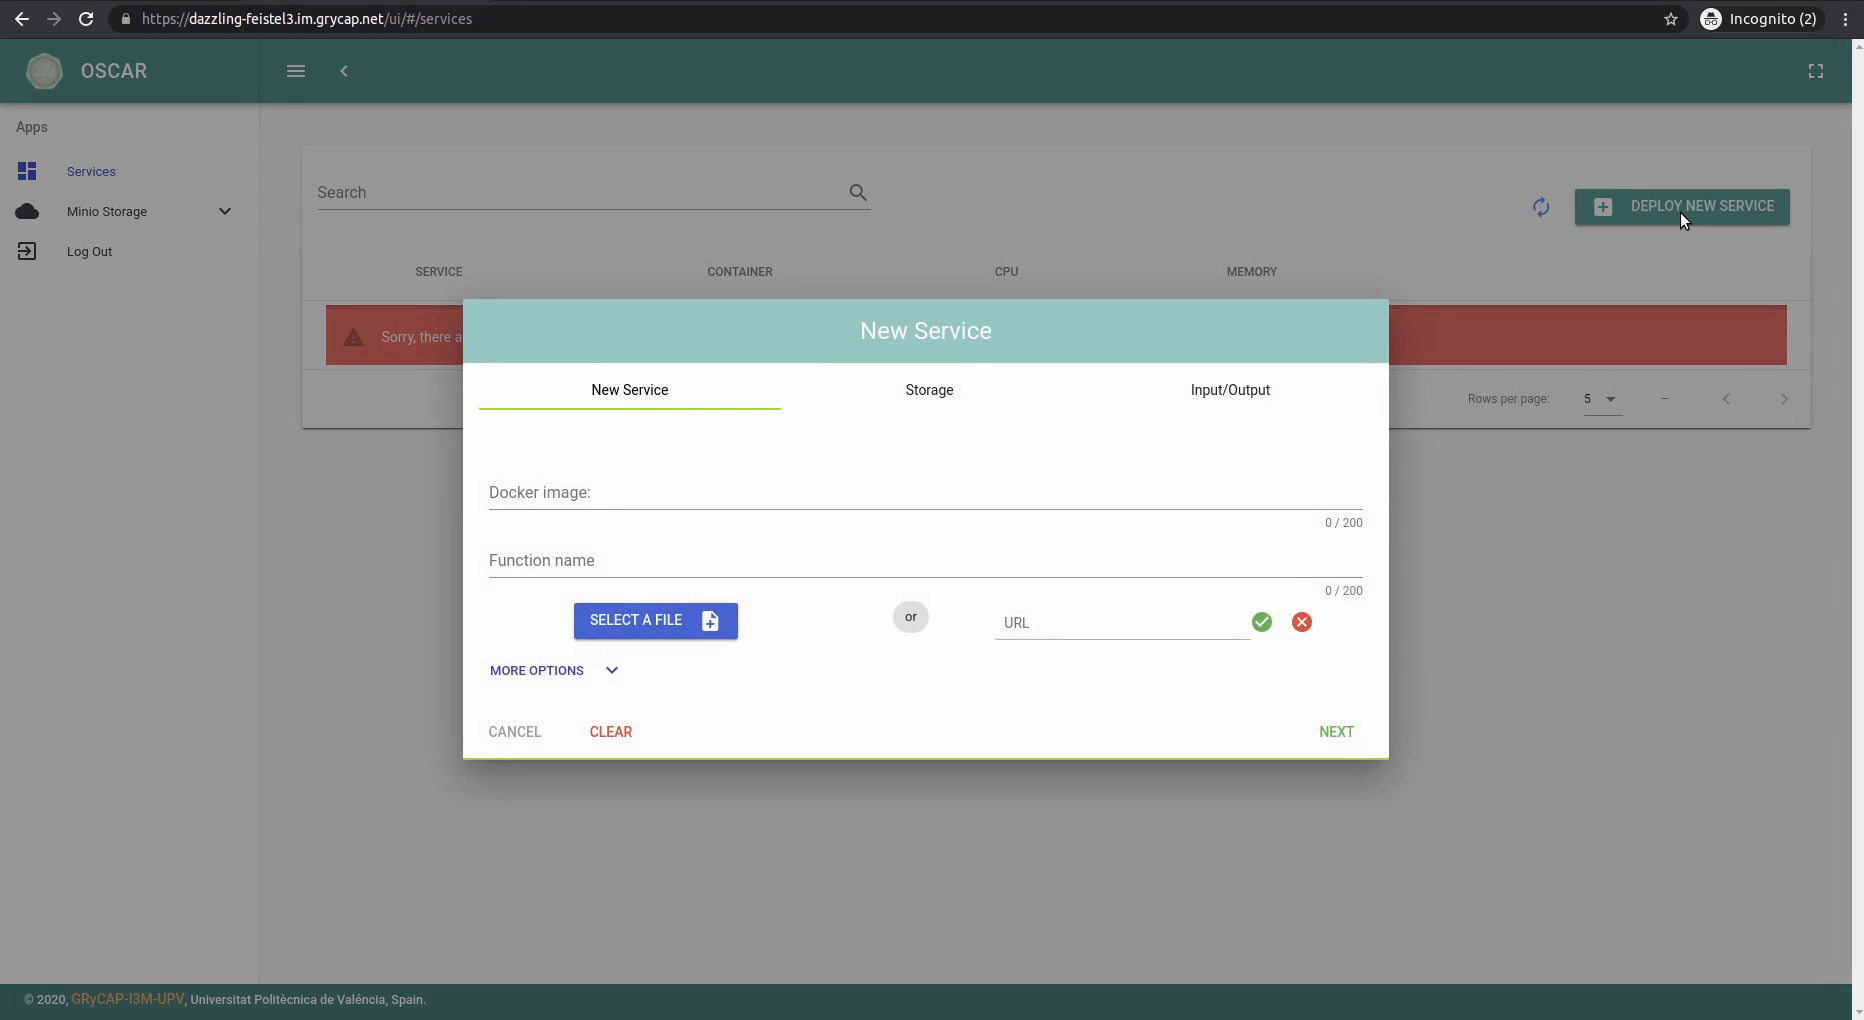
Step 14: The OSCAR cluster is prepared to be used, click “Deploy new service” to start.
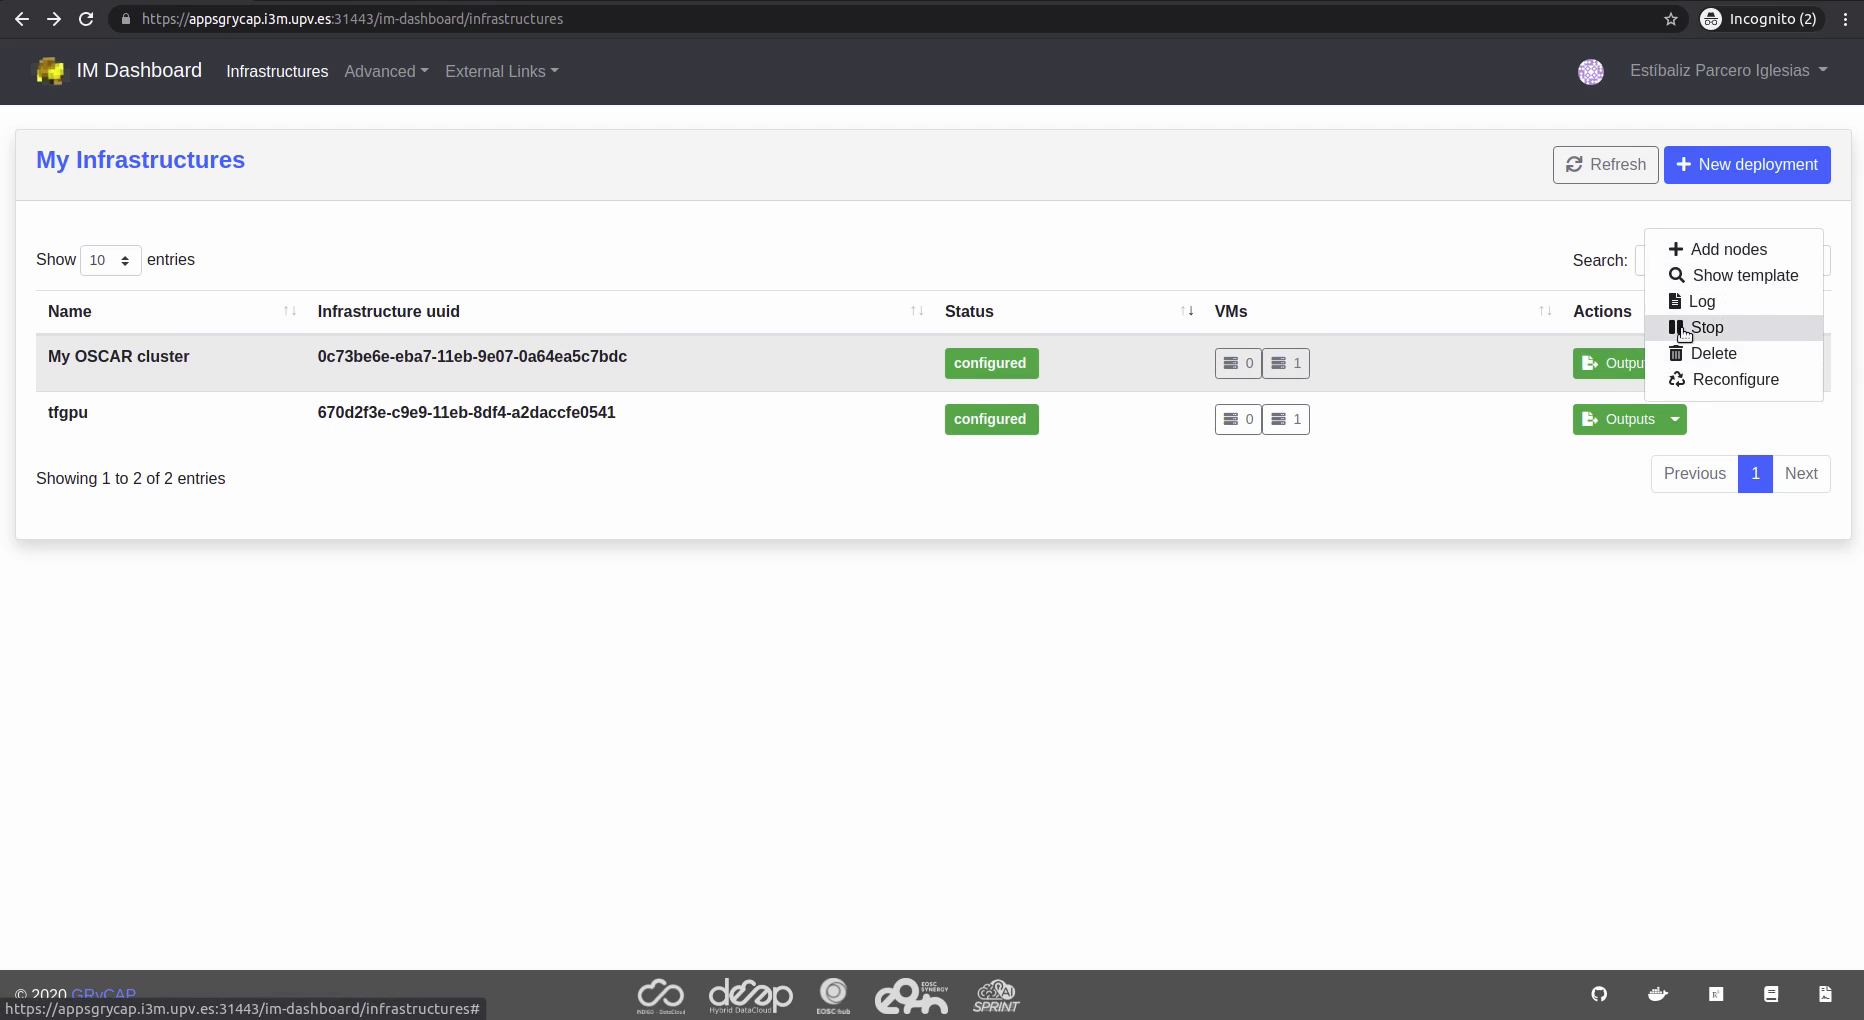
Step 15: To stop/delete the OSCAR cluster, return to the IM Dashboard -> “My Infrastructures” and select the appropriate option.
Youtube video
Here you have a follow along video including all the steps, enjoy!