OSCAR is a framework to efficiently support on-premises FaaS (Functions as a Service) for general-purpose file-processing computing applications. Users upload files to a bucket and this automatically triggers the execution of parallel invocations to a function responsible for processing each file. For example, you can deploy a machine learning inference environment by defining a function in your OSCAR cluster, and every time you upload an image to your bucket the inference process is triggered, and the result is stored.
To manage your elastic OSCAR cluster and define functions you have two options: either the Oscar graphical user interface, i.e. OSCAR-GUI, or a command line tool called OSCAR-CLI.
In the following guide you are going to learn how to deploy a machine learning inference environment and to use it employing both tools. You can also find a YouTube video of the whole process below.
Some useful information before beginning:
- The elastic OSCAR cluster can be deployed using the IM Dashboard as explained here in the documentation.
- The OSCAR GUI is exposed via a Kubernetes ingress and it is accessible via the Kubernetes master node IP.
- The OSCAR-CLI can be easily installed in your local.
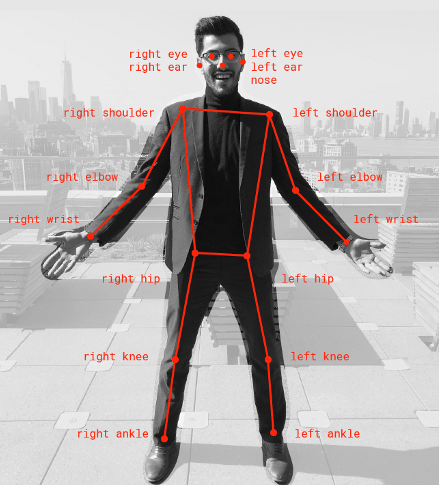
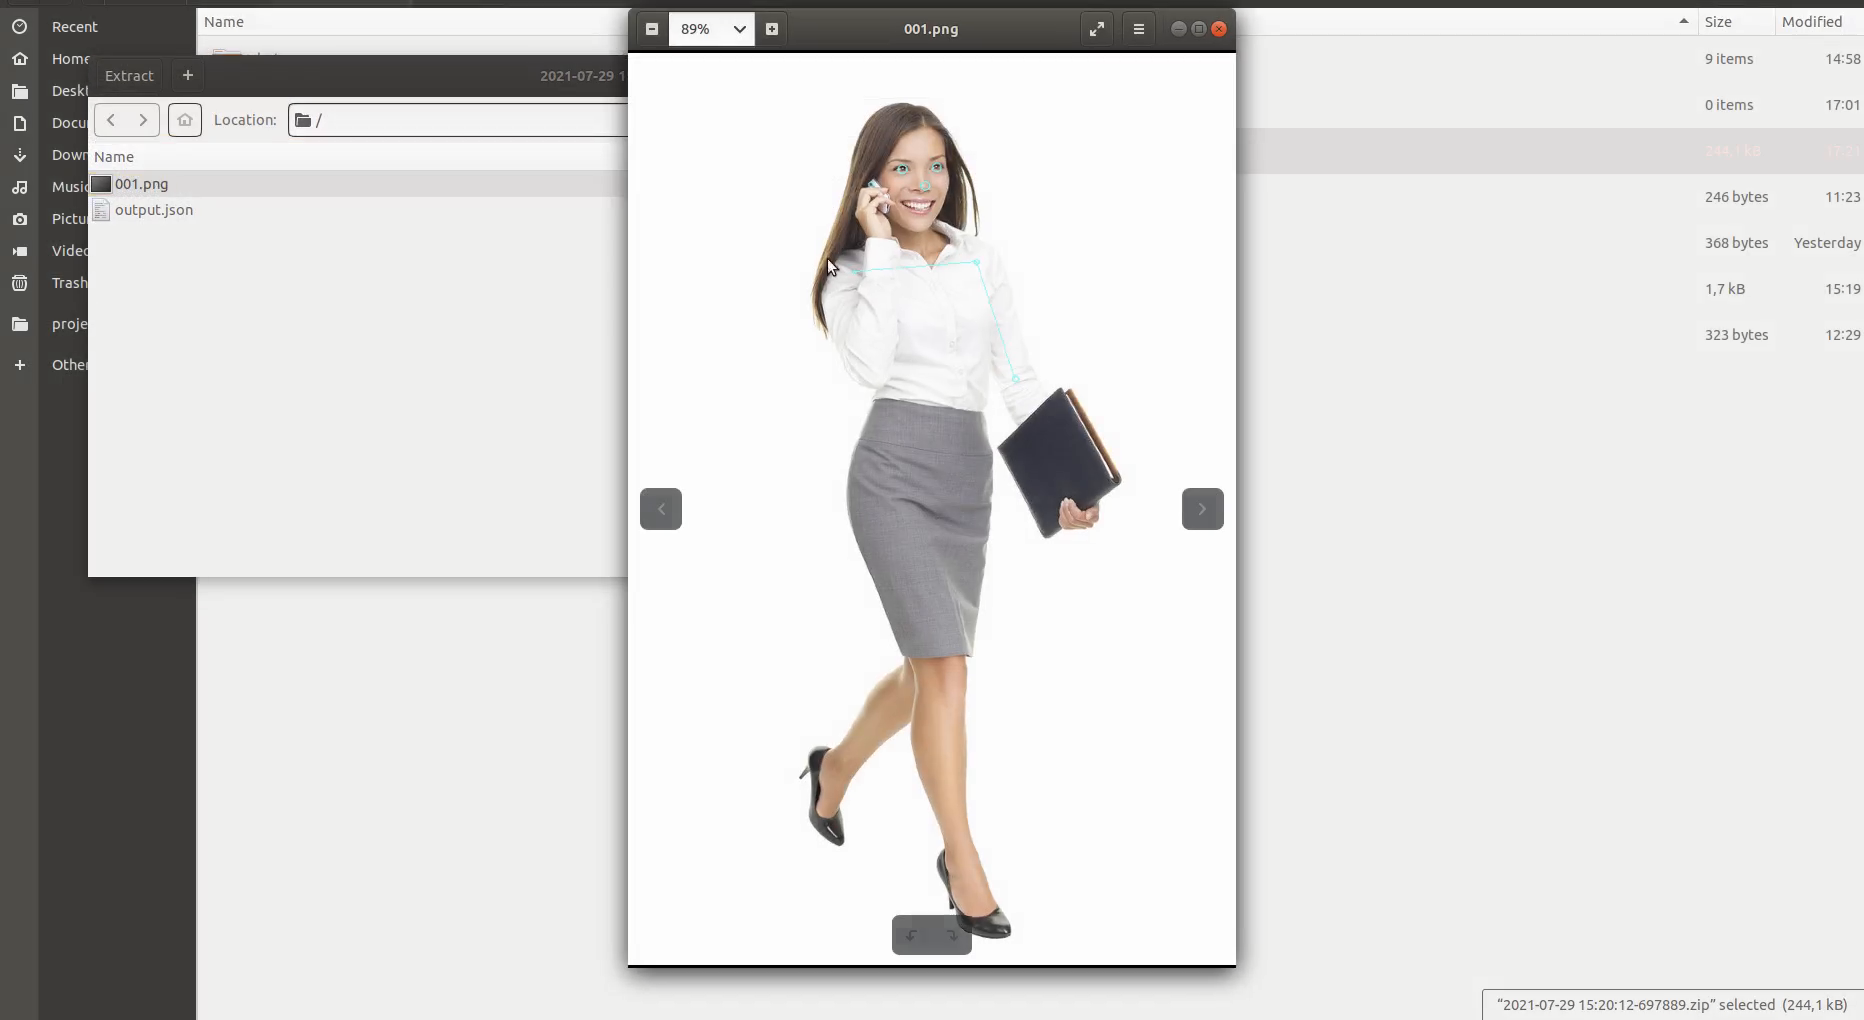
- The chosen model is the Posenet model, developed by Google and available in the DEEP Open Catalog, that detects the pose of a person in an image. The predict method expects an RGB image as input and returns as output the different body keypoints with the corresponding coordinates and the associated key score.
Add a cluster to OSCAR-CLI
Step 1: Once your OSCAR cluster is deployed, and OSCAR-CLI installed, you can add the cluster by simply executing:
$ oscar-cli cluster add IDENTIFIER ENDPOINT USERNAME {PASSWORD | --password-stdin} [flags]- IDENTIFIER is a name for your cluster.
- ENDPOINT is where OSCAR is exposed.
- USERNAME and PASSWORD are the values you chose when deploying your cluster.
Step 2: Check the added cluster:
$ oscar-cli cluster list  As you can see, the cluster oscar-cluster is added and marked as Default. Now, you are ready to deploy a service.
Create a FaaS in our elastic OSCAR cluster
To create a FaaS you need to create a new service in your elastic OSCAR cluster. You can use either OSCAR-CLI or the OSCAR graphical interface.
Using OSCAR-CLI to deploy a new service
Step 1: First, create a FDL file:
 1functions:
 2  oscar:
 3  - oscar-cluster:
 4      name: posenet
 5      memory: 2Gi
 6      cpu: '1.0'
 7      image: deephdc/deep-oc-posenet-tf
 8      script: deepaas.sh
 9      input:
10      - storage_provider: minio.default
11        path: posenet/input
12      output:
13      - storage_provider: minio.default
14        path: posenet/output
In this example, your cluster oscar-cluster deploys the service posenet using the image deephdc/deep-oc-posenet-tf. It uses a MinIO bucket to store the input images (that triggers the inference) and the output results. And it executes the following script (saved as deepass.sh):
1#!/bin/bash
2
3IMAGE_NAME=`basename "$INPUT_FILE_PATH"`
4OUTPUT_IMAGE="$TMP_OUTPUT_DIR/"
5
6deepaas-predict -i "$INPUT_FILE_PATH" -ct application/zip -o $OUTPUT_IMAGE
Step 2: Add the service to your cluster by applying the FDL file:
$ oscar-cli apply posenet-fdl.yaml
Step 3: Check the deployed service:

Step 4: To modify some parameters in the deployed service you can just edit the FDL file and apply it again.
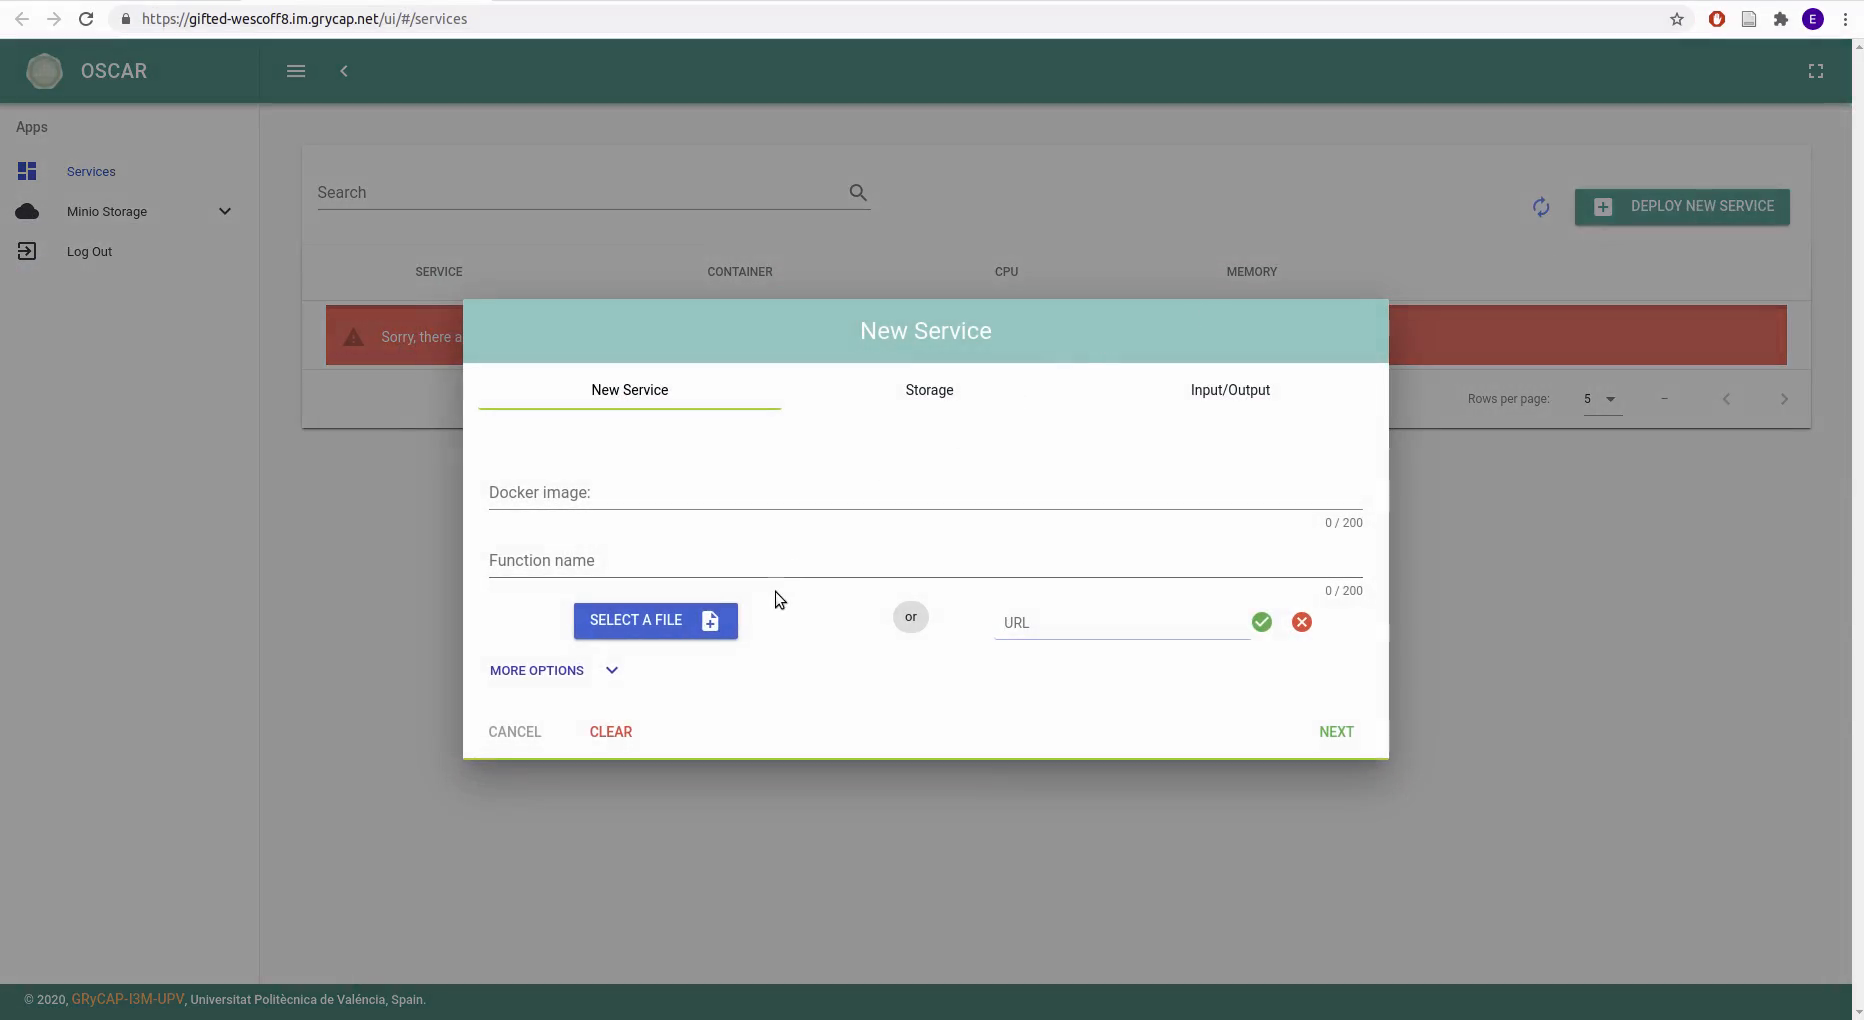
Using OSCAR graphical interface to deploy a new service
Alternatively, you can use the GUI as shown here in the documentation:
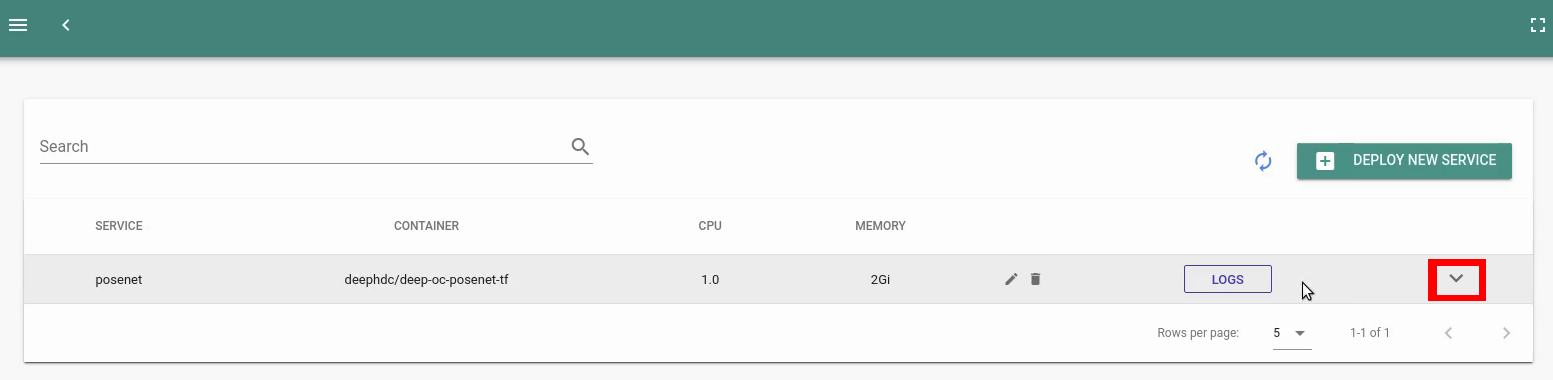
To inspect the just created service and edit the values (such as the assigned memory):
Step 1: Click the button to display the Service Info:
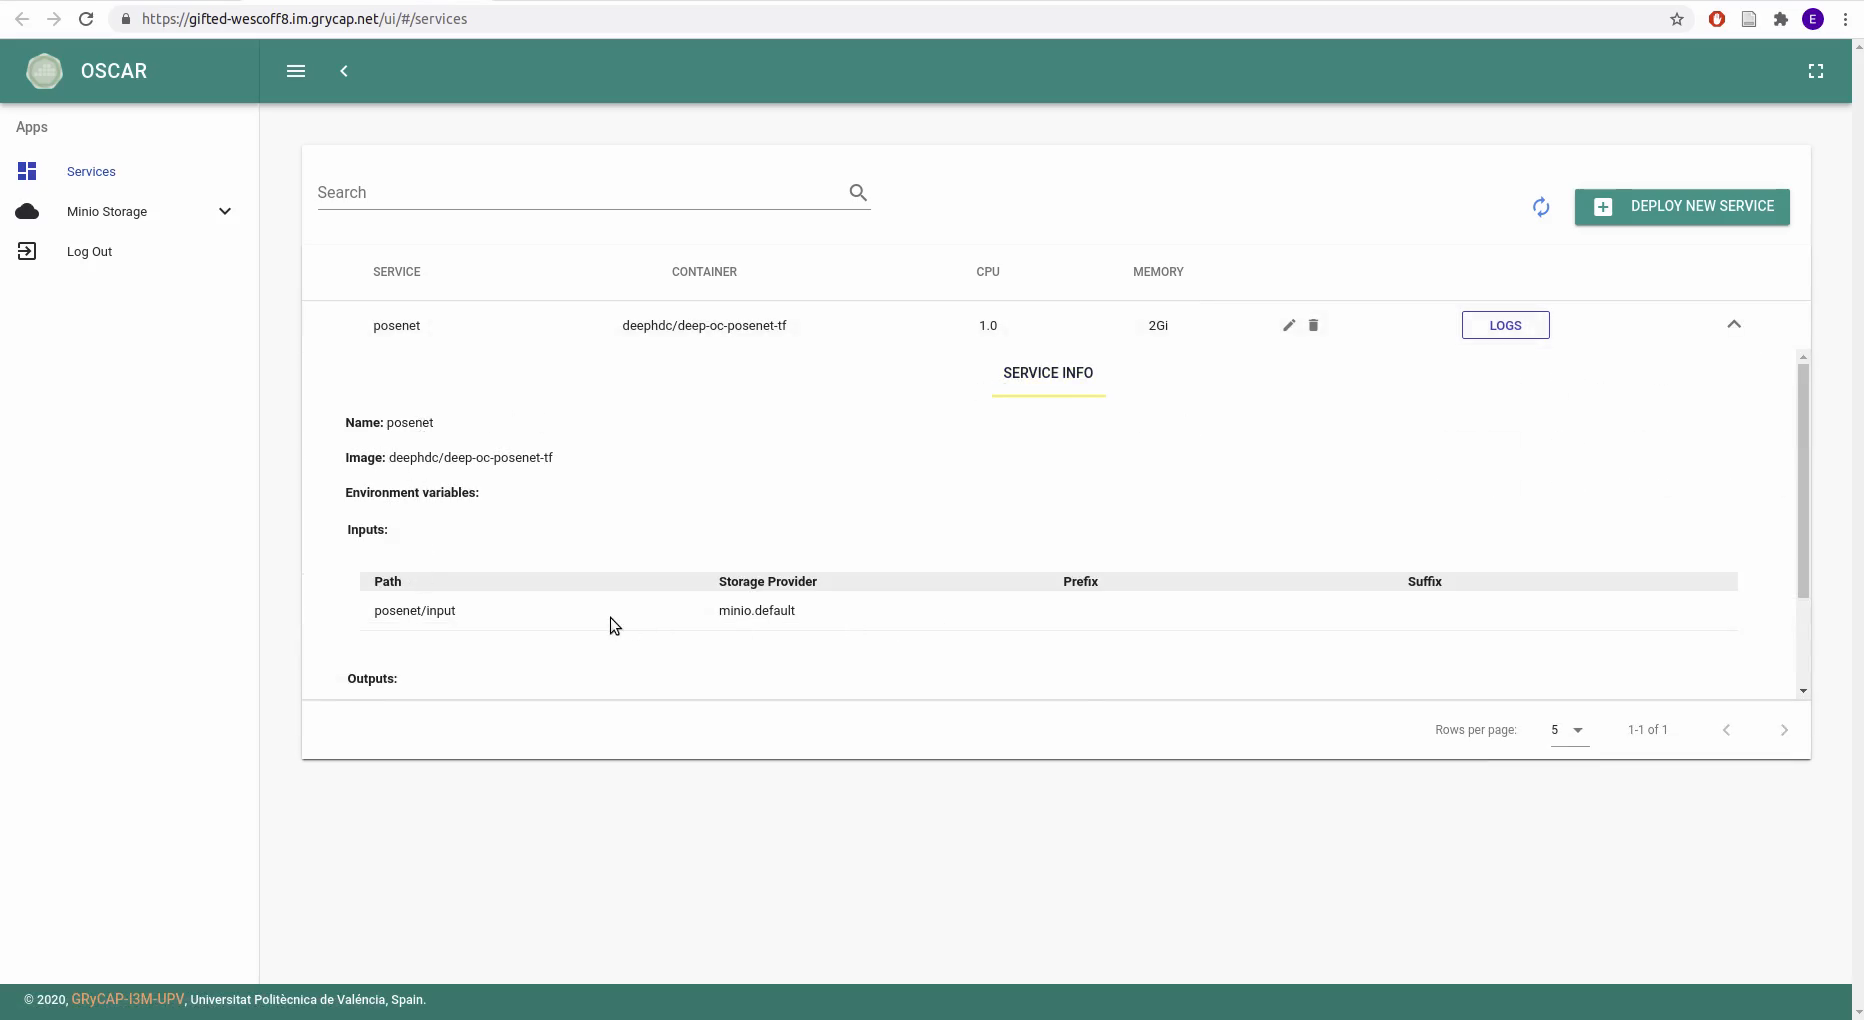
Step 2: From this section you can inspect the Service Info:
Step 3: By clicking the edit button you can modify the values:

Step 4: For example, to modify the assigned memory, go to the Memory section and edit the value:
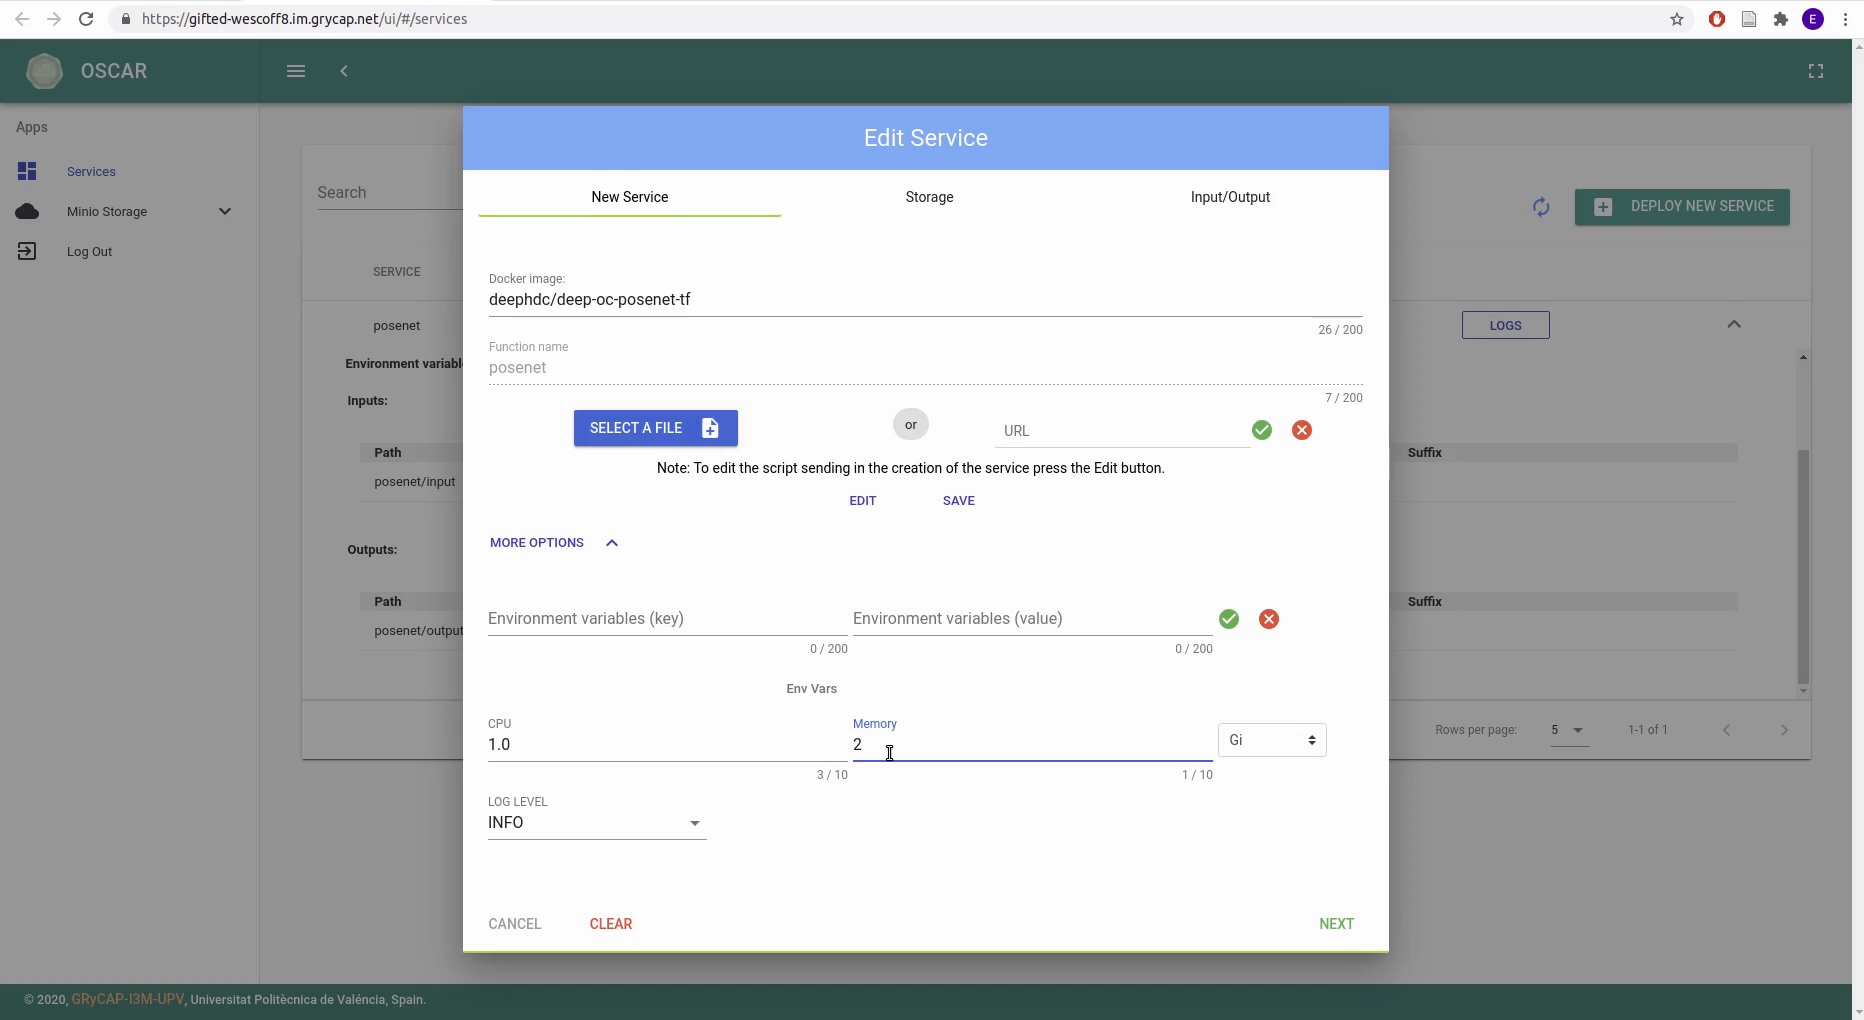
Step 5: Click Next to continue the wizard, and finally click Submit.
Launching the POSENET inference service
As explained at the beginning, the deployed service will be triggered by uploading images to your input folder in your MinIO bucket. This process can also be done using either the OSCAR-CLI tool or the graphical interface.
Launch the service using OSCAR-CLI
Step 1: Keep track of the submitted jobs:
$ watch oscar-cli service logs list posenet For the moment, the logs are empty.
Step 2: Upload images to the input bucket:
$ oscar-cli service put-file SERVICE_NAME STORAGE_PROVIDER LOCAL_FILE REMOTE_FILE Where:
- SERVICE_NAME is posenet in the example.
- STORAGE_PROVIDER is minio in the example.
- LOCAL_FILE is the path to your image in your local machine.
- REMOTE_FILE is the path to the file to be store in your input folder in MinIO.

This upload triggers the execution of the jobs.
Step 3: Check the jobs complete successfully:

Step 4: List files in the output folder of the MinIO bucket:

Step 5: Get a file and store it in your local machine:

Step 6: Unzip and inspect the results:
Launch the service using Oscar graphical interface
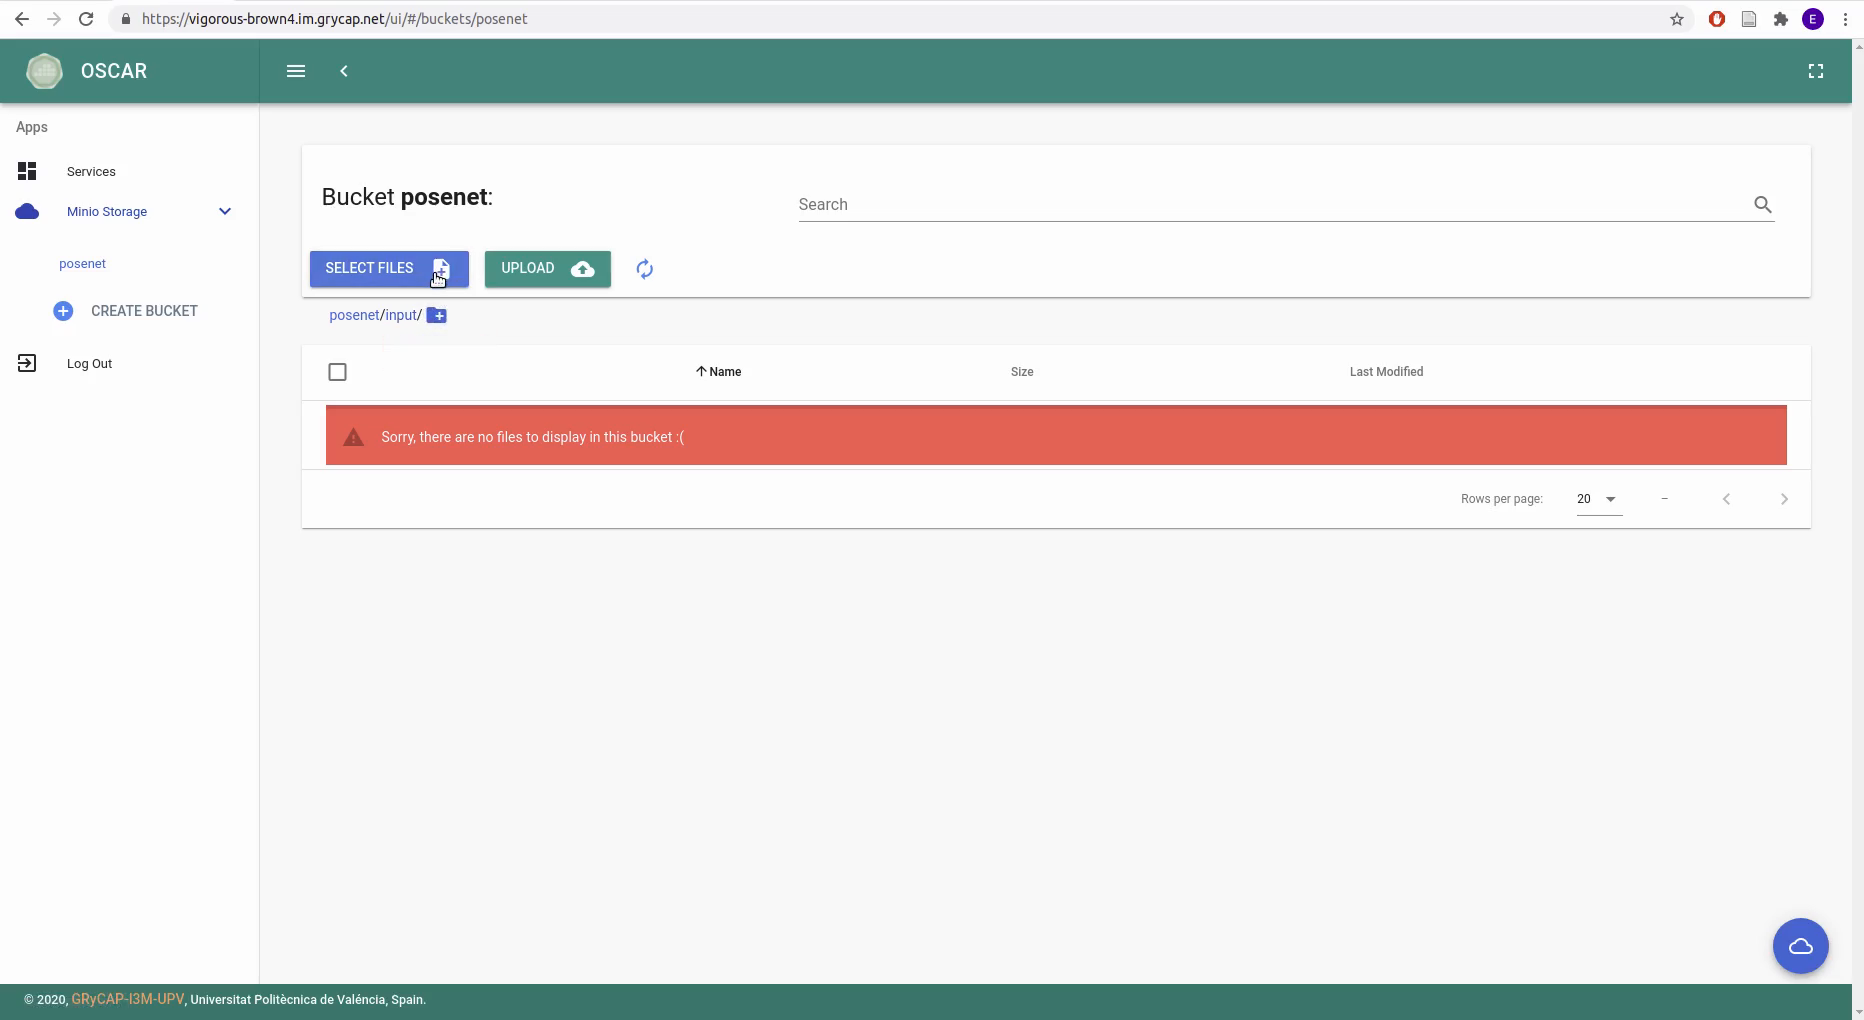
Step 1: Upload images to the input bucket, from the OSCAR GUI, go to Minio Storage at the left menu, select the input folder, click SELECT FILES and then UPLOAD:
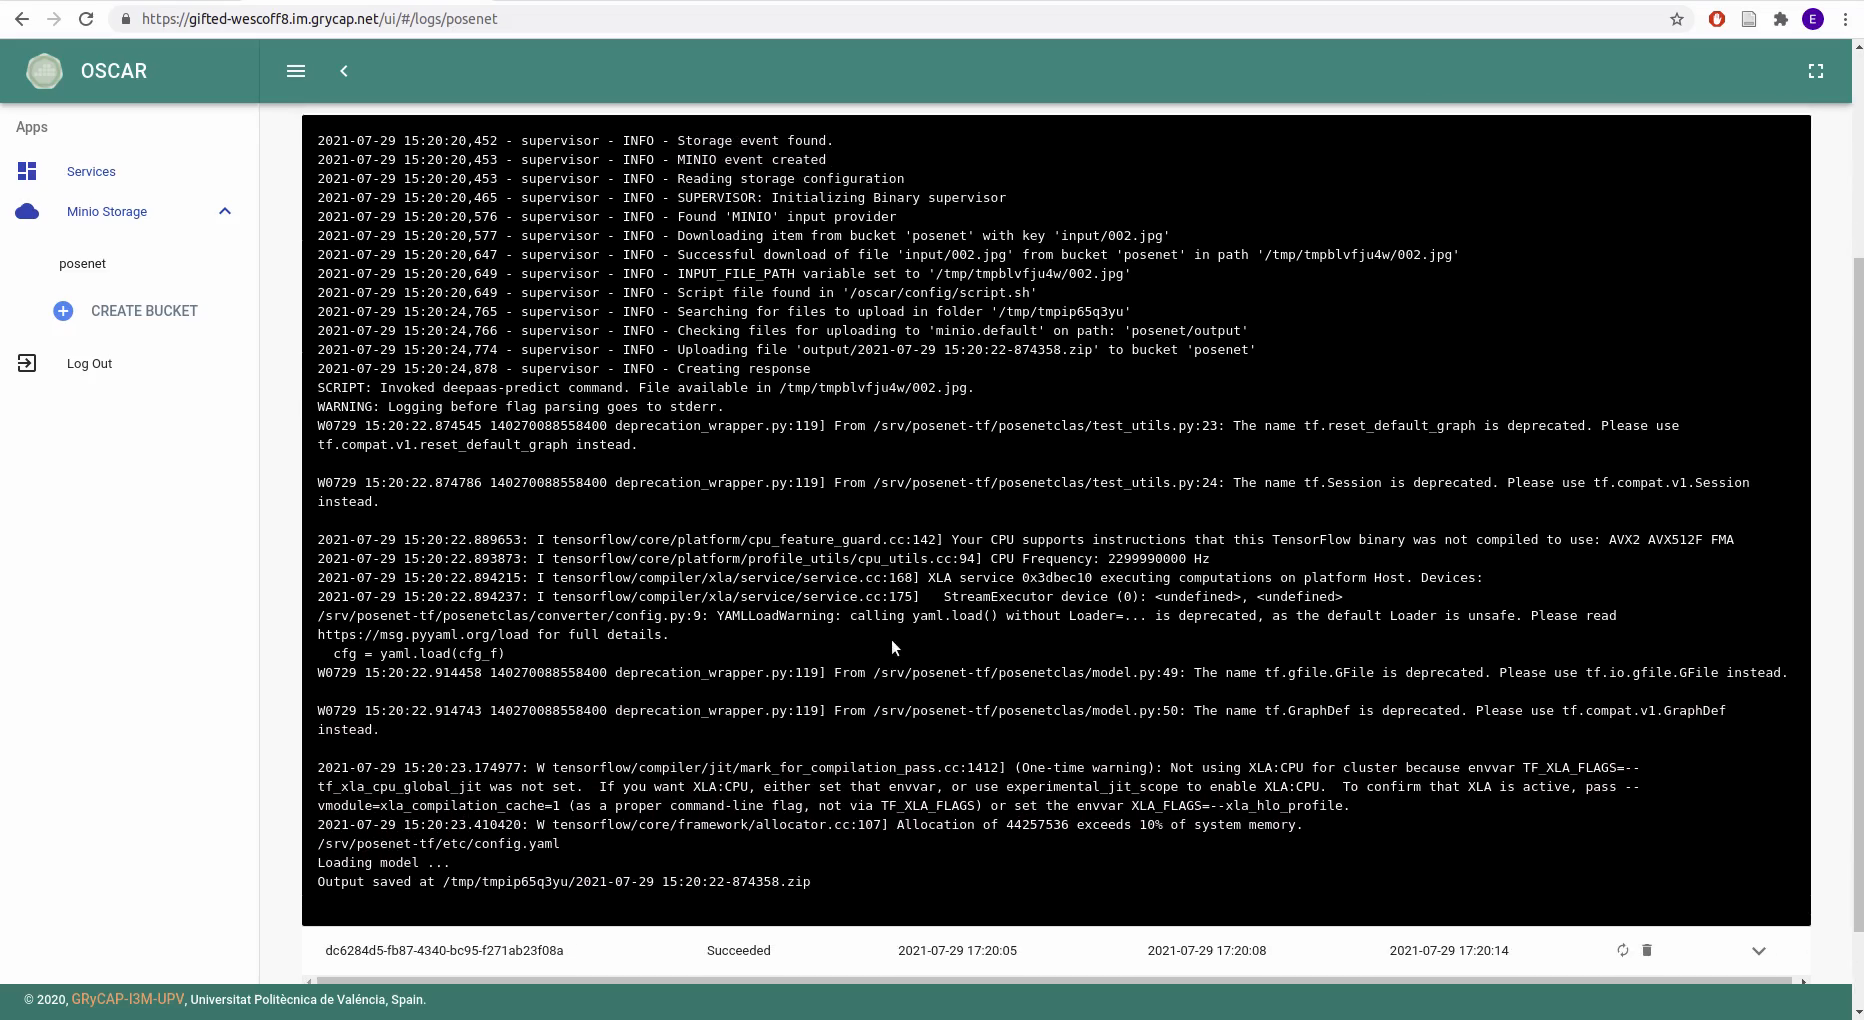
Step 2: Check the logs for a job by clicking the LOGS button of the service, and click the rightmost button to display it:
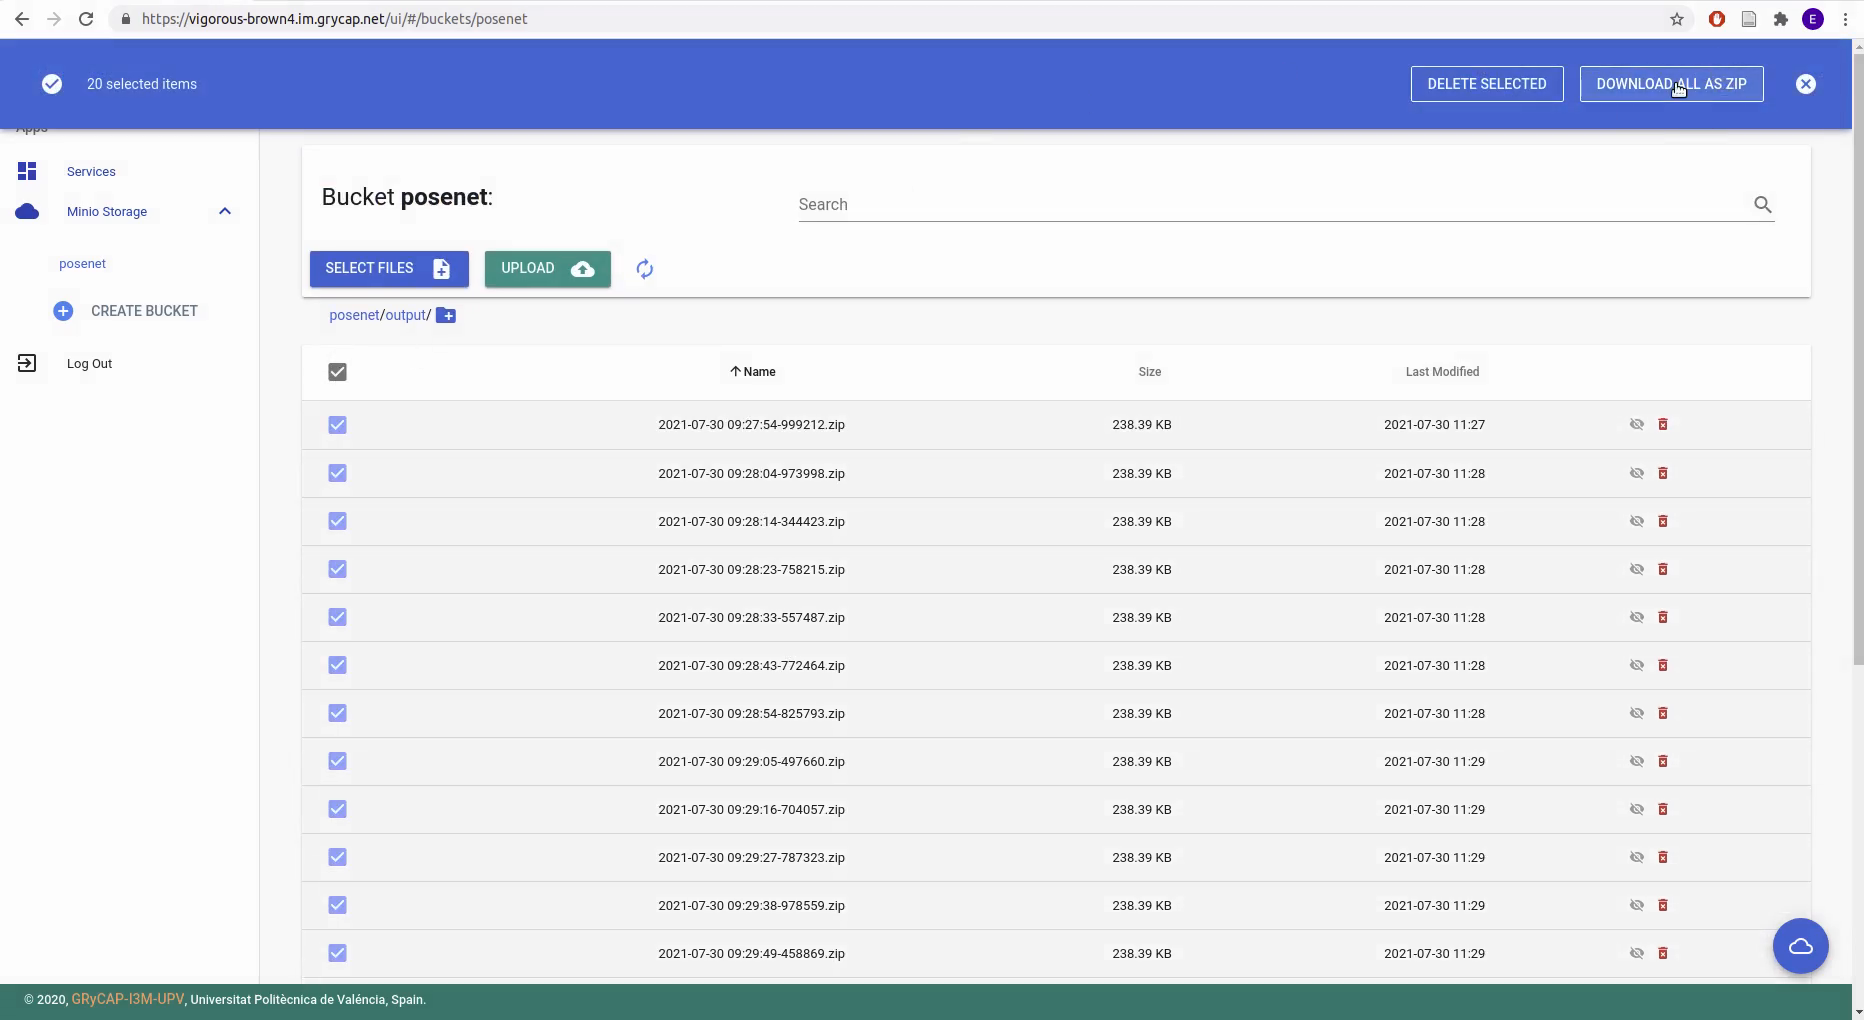
Step 3: Download the output results by clicking Minio Storage at the left menu, go to the output folder, select the items to download, and click DOWNLOAD ALL AS ZIP:
Scaling up
Deploying an elastic Kubernetes cluster with the OSCAR platform means using EC3, a tool that deploys elastic virtual clusters, and CLUES, a tool to power off internal cluster nodes when they are not being used, and conversely to power them on when they are needed.
Watch the status of the provisioned node(s) by issuing:
$ watch clues status This is an example of the clues status while launching a batch of approximately 100 images:

Youtube video
Finally, here you have a follow along video including all the steps, enjoy!
OSCAR, IM, EC3, and CLUES tools shown on this post are developed by the GRyCAP research group at the Universitat Politècnica de València.